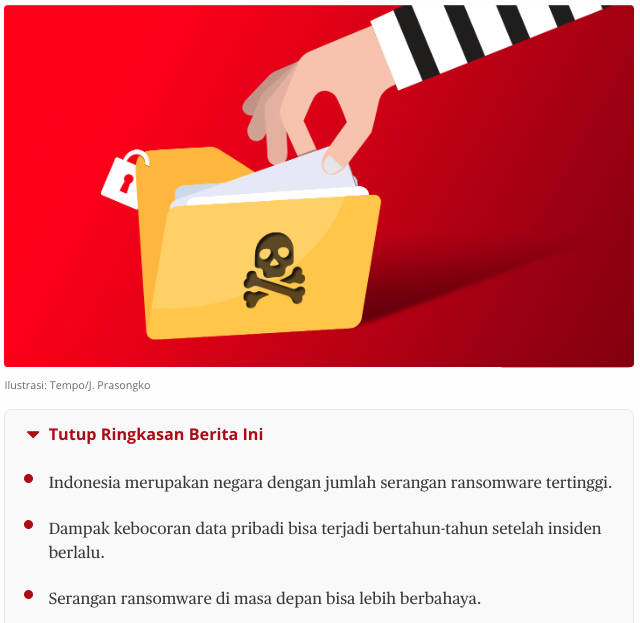
Category Archives: Teknoblogia

Setup OpenVPN Server on Proxmox LXC

I needed to do this, but all the tutorials that I could find are incomplete, or already outdated, such as this.

After hacking around for a while, here’s how to correctly setup OpenVPN server in a container on Proxmox:

(btw if you just need to setup an OpenVPN Server in a normal server / non-container, then just do the “in container” part below)

IN HOST

# create special device "tun" for OpenVPN
mkdir -p /devcontainer/net
mknod /devcontainer/net/tun c 10 200
chown 100000:100000 /devcontainer/net/tun

# enable your container to use that tun device
# change 124 into your container's number : pct list
echo "lxc.mount.entry: /devcontainer/net dev/net none bind,create=dir" >> /etc/pve/lxc/124.conf

# forward OpenVPN traffic to your container's IP address
# change 10.10.60.6 to your container's IP address
iptables -t nat -A PREROUTING -i vmbr0 -p tcp -m tcp --dport 1194 -j DNAT --to-destination 10.10.60.6:1194

iptables -t nat -A PREROUTING -i vmbr0 -p udp -m udp --dport 1194 -j DNAT --to-destination 10.10.60.6:1194

iptables -t nat -A PREROUTING -i vmbr1 -p tcp -m tcp --dport 53 -j DNAT --to-destination 10.10.60.6:53

# save iptables's rule
iptables-save > /etc/iptables.rules

IN CONTAINER

# execute the automated OpenVPN installation script 
mkdir /root/scripts
cd /root/scripts

wget git.io/vpn --no-check-certificate -O openvpn-install.sh ; chmod +x openvpn-install.sh ; ./openvpn-install.sh
 
# if you'd like to change the default 10.8.0.xxx IP address, do this :
# vi openvpn-install.sh
# :%s/10.8.0/10.88.0/g

# setup NAT, so the OpenVPN clients can connect to the internet 
# while connected to this OpenVPN server
iptables -I POSTROUTING -t nat -s 10.88.0.0/24 -j MASQUERADE

# save iptables's rule
iptables-save > /etc/iptables.rules

After executing the /root/scripts/openvpn-install.sh script , it will result in a file with ovpn extension

Download that to your computer / client,
install OpenVPN client,
and use that ovpn file as the configuration

Enjoy !


In case that very helpful OpenVPN Server install script suddenly disappear, here it is :

#!/bin/bash
#
# https://github.com/Nyr/openvpn-install
#
# Copyright (c) 2013 Nyr. Released under the MIT License.


# Detect Debian users running the script with "sh" instead of bash
if readlink /proc/$$/exe | grep -q "dash"; then
	echo 'This installer needs to be run with "bash", not "sh".'
	exit
fi

# Discard stdin. Needed when running from an one-liner which includes a newline
read -N 999999 -t 0.001

# Detect OpenVZ 6
if [[ $(uname -r | cut -d "." -f 1) -eq 2 ]]; then
	echo "The system is running an old kernel, which is incompatible with this installer."
	exit
fi

# Detect OS
# $os_version variables aren't always in use, but are kept here for convenience
if grep -qs "ubuntu" /etc/os-release; then
	os="ubuntu"
	os_version=$(grep 'VERSION_ID' /etc/os-release | cut -d '"' -f 2 | tr -d '.')
	group_name="nogroup"
elif [[ -e /etc/debian_version ]]; then
	os="debian"
	os_version=$(grep -oE '[0-9]+' /etc/debian_version | head -1)
	group_name="nogroup"
elif [[ -e /etc/centos-release ]]; then
	os="centos"
	os_version=$(grep -oE '[0-9]+' /etc/centos-release | head -1)
	group_name="nobody"
elif [[ -e /etc/fedora-release ]]; then
	os="fedora"
	os_version=$(grep -oE '[0-9]+' /etc/fedora-release | head -1)
	group_name="nobody"
else
	echo "This installer seems to be running on an unsupported distribution.
Supported distributions are Ubuntu, Debian, CentOS, and Fedora."
	exit
fi

if [[ "$os" == "ubuntu" && "$os_version" -lt 1804 ]]; then
	echo "Ubuntu 18.04 or higher is required to use this installer.
This version of Ubuntu is too old and unsupported."
	exit
fi

if [[ "$os" == "debian" && "$os_version" -lt 9 ]]; then
	echo "Debian 9 or higher is required to use this installer.
This version of Debian is too old and unsupported."
	exit
fi

if [[ "$os" == "centos" && "$os_version" -lt 7 ]]; then
	echo "CentOS 7 or higher is required to use this installer.
This version of CentOS is too old and unsupported."
	exit
fi

# Detect environments where $PATH does not include the sbin directories
if ! grep -q sbin <<< "$PATH"; then
	echo '$PATH does not include sbin. Try using "su -" instead of "su".'
	exit
fi

if [[ "$EUID" -ne 0 ]]; then
	echo "This installer needs to be run with superuser privileges."
	exit
fi

if [[ ! -e /dev/net/tun ]] || ! ( exec 7<>/dev/net/tun ) 2>/dev/null; then
	echo "The system does not have the TUN device available.
TUN needs to be enabled before running this installer."
	exit
fi

new_client () {
	# Generates the custom client.ovpn
	{
	cat /etc/openvpn/server/client-common.txt
	echo "<ca>"
	cat /etc/openvpn/server/easy-rsa/pki/ca.crt
	echo "</ca>"
	echo "<cert>"
	sed -ne '/BEGIN CERTIFICATE/,$ p' /etc/openvpn/server/easy-rsa/pki/issued/"$client".crt
	echo "</cert>"
	echo "<key>"
	cat /etc/openvpn/server/easy-rsa/pki/private/"$client".key
	echo "</key>"
	echo "<tls-crypt>"
	sed -ne '/BEGIN OpenVPN Static key/,$ p' /etc/openvpn/server/tc.key
	echo "</tls-crypt>"
	} > ~/"$client".ovpn
}

if [[ ! -e /etc/openvpn/server/server.conf ]]; then
	clear
	echo 'Welcome to this OpenVPN road warrior installer!'
	# If system has a single IPv4, it is selected automatically. Else, ask the user
	if [[ $(ip -4 addr | grep inet | grep -vEc '127(\.[0-9]{1,3}){3}') -eq 1 ]]; then
		ip=$(ip -4 addr | grep inet | grep -vE '127(\.[0-9]{1,3}){3}' | cut -d '/' -f 1 | grep -oE '[0-9]{1,3}(\.[0-9]{1,3}){3}')
	else
		number_of_ip=$(ip -4 addr | grep inet | grep -vEc '127(\.[0-9]{1,3}){3}')
		echo
		echo "Which IPv4 address should be used?"
		ip -4 addr | grep inet | grep -vE '127(\.[0-9]{1,3}){3}' | cut -d '/' -f 1 | grep -oE '[0-9]{1,3}(\.[0-9]{1,3}){3}' | nl -s ') '
		read -p "IPv4 address [1]: " ip_number
		until [[ -z "$ip_number" || "$ip_number" =~ ^[0-9]+$ && "$ip_number" -le "$number_of_ip" ]]; do
			echo "$ip_number: invalid selection."
			read -p "IPv4 address [1]: " ip_number
		done
		[[ -z "$ip_number" ]] && ip_number="1"
		ip=$(ip -4 addr | grep inet | grep -vE '127(\.[0-9]{1,3}){3}' | cut -d '/' -f 1 | grep -oE '[0-9]{1,3}(\.[0-9]{1,3}){3}' | sed -n "$ip_number"p)
	fi
	# If $ip is a private IP address, the server must be behind NAT
	if echo "$ip" | grep -qE '^(10\.|172\.1[6789]\.|172\.2[0-9]\.|172\.3[01]\.|192\.168)'; then
		echo
		echo "This server is behind NAT. What is the public IPv4 address or hostname?"
		# Get public IP and sanitize with grep
		get_public_ip=$(grep -m 1 -oE '^[0-9]{1,3}(\.[0-9]{1,3}){3}$' <<< "$(wget -T 10 -t 1 -4qO- "http://ip1.dynupdate.no-ip.com/" || curl -m 10 -4Ls "http://ip1.dynupdate.no-ip.com/")")
		read -p "Public IPv4 address / hostname [$get_public_ip]: " public_ip
		# If the checkip service is unavailable and user didn't provide input, ask again
		until [[ -n "$get_public_ip" || -n "$public_ip" ]]; do
			echo "Invalid input."
			read -p "Public IPv4 address / hostname: " public_ip
		done
		[[ -z "$public_ip" ]] && public_ip="$get_public_ip"
	fi
	# If system has a single IPv6, it is selected automatically
	if [[ $(ip -6 addr | grep -c 'inet6 [23]') -eq 1 ]]; then
		ip6=$(ip -6 addr | grep 'inet6 [23]' | cut -d '/' -f 1 | grep -oE '([0-9a-fA-F]{0,4}:){1,7}[0-9a-fA-F]{0,4}')
	fi
	# If system has multiple IPv6, ask the user to select one
	if [[ $(ip -6 addr | grep -c 'inet6 [23]') -gt 1 ]]; then
		number_of_ip6=$(ip -6 addr | grep -c 'inet6 [23]')
		echo
		echo "Which IPv6 address should be used?"
		ip -6 addr | grep 'inet6 [23]' | cut -d '/' -f 1 | grep -oE '([0-9a-fA-F]{0,4}:){1,7}[0-9a-fA-F]{0,4}' | nl -s ') '
		read -p "IPv6 address [1]: " ip6_number
		until [[ -z "$ip6_number" || "$ip6_number" =~ ^[0-9]+$ && "$ip6_number" -le "$number_of_ip6" ]]; do
			echo "$ip6_number: invalid selection."
			read -p "IPv6 address [1]: " ip6_number
		done
		[[ -z "$ip6_number" ]] && ip6_number="1"
		ip6=$(ip -6 addr | grep 'inet6 [23]' | cut -d '/' -f 1 | grep -oE '([0-9a-fA-F]{0,4}:){1,7}[0-9a-fA-F]{0,4}' | sed -n "$ip6_number"p)
	fi
	echo
	echo "Which protocol should OpenVPN use?"
	echo "   1) UDP (recommended)"
	echo "   2) TCP"
	read -p "Protocol [1]: " protocol
	until [[ -z "$protocol" || "$protocol" =~ ^[12]$ ]]; do
		echo "$protocol: invalid selection."
		read -p "Protocol [1]: " protocol
	done
	case "$protocol" in
		1|"") 
		protocol=udp
		;;
		2) 
		protocol=tcp
		;;
	esac
	echo
	echo "What port should OpenVPN listen to?"
	read -p "Port [1194]: " port
	until [[ -z "$port" || "$port" =~ ^[0-9]+$ && "$port" -le 65535 ]]; do
		echo "$port: invalid port."
		read -p "Port [1194]: " port
	done
	[[ -z "$port" ]] && port="1194"
	echo
	echo "Select a DNS server for the clients:"
	echo "   1) Current system resolvers"
	echo "   2) Google"
	echo "   3) 1.1.1.1"
	echo "   4) OpenDNS"
	echo "   5) Quad9"
	echo "   6) AdGuard"
	read -p "DNS server [1]: " dns
	until [[ -z "$dns" || "$dns" =~ ^[1-6]$ ]]; do
		echo "$dns: invalid selection."
		read -p "DNS server [1]: " dns
	done
	echo
	echo "Enter a name for the first client:"
	read -p "Name [client]: " unsanitized_client
	# Allow a limited set of characters to avoid conflicts
	client=$(sed 's/[^0123456789abcdefghijklmnopqrstuvwxyzABCDEFGHIJKLMNOPQRSTUVWXYZ_-]/_/g' <<< "$unsanitized_client")
	[[ -z "$client" ]] && client="client"
	echo
	echo "OpenVPN installation is ready to begin."
	# Install a firewall in the rare case where one is not already available
	if ! systemctl is-active --quiet firewalld.service && ! hash iptables 2>/dev/null; then
		if [[ "$os" == "centos" || "$os" == "fedora" ]]; then
			firewall="firewalld"
			# We don't want to silently enable firewalld, so we give a subtle warning
			# If the user continues, firewalld will be installed and enabled during setup
			echo "firewalld, which is required to manage routing tables, will also be installed."
		elif [[ "$os" == "debian" || "$os" == "ubuntu" ]]; then
			# iptables is way less invasive than firewalld so no warning is given
			firewall="iptables"
		fi
	fi
	read -n1 -r -p "Press any key to continue..."
	# If running inside a container, disable LimitNPROC to prevent conflicts
	if systemd-detect-virt -cq; then
		mkdir /etc/systemd/system/openvpn-server@server.service.d/ 2>/dev/null
		echo "[Service]
LimitNPROC=infinity" > /etc/systemd/system/openvpn-server@server.service.d/disable-limitnproc.conf
	fi
	if [[ "$os" = "debian" || "$os" = "ubuntu" ]]; then
		apt-get update
		apt-get install -y openvpn openssl ca-certificates $firewall
	elif [[ "$os" = "centos" ]]; then
		yum install -y epel-release
		yum install -y openvpn openssl ca-certificates tar $firewall
	else
		# Else, OS must be Fedora
		dnf install -y openvpn openssl ca-certificates tar $firewall
	fi
	# If firewalld was just installed, enable it
	if [[ "$firewall" == "firewalld" ]]; then
		systemctl enable --now firewalld.service
	fi
	# Get easy-rsa
	easy_rsa_url='https://github.com/OpenVPN/easy-rsa/releases/download/v3.0.8/EasyRSA-3.0.8.tgz'
	mkdir -p /etc/openvpn/server/easy-rsa/
	{ wget -qO- "$easy_rsa_url" 2>/dev/null || curl -sL "$easy_rsa_url" ; } | tar xz -C /etc/openvpn/server/easy-rsa/ --strip-components 1
	chown -R root:root /etc/openvpn/server/easy-rsa/
	cd /etc/openvpn/server/easy-rsa/
	# Create the PKI, set up the CA and the server and client certificates
	./easyrsa init-pki
	./easyrsa --batch build-ca nopass
	EASYRSA_CERT_EXPIRE=3650 ./easyrsa build-server-full server nopass
	EASYRSA_CERT_EXPIRE=3650 ./easyrsa build-client-full "$client" nopass
	EASYRSA_CRL_DAYS=3650 ./easyrsa gen-crl
	# Move the stuff we need
	cp pki/ca.crt pki/private/ca.key pki/issued/server.crt pki/private/server.key pki/crl.pem /etc/openvpn/server
	# CRL is read with each client connection, while OpenVPN is dropped to nobody
	chown nobody:"$group_name" /etc/openvpn/server/crl.pem
	# Without +x in the directory, OpenVPN can't run a stat() on the CRL file
	chmod o+x /etc/openvpn/server/
	# Generate key for tls-crypt
	openvpn --genkey --secret /etc/openvpn/server/tc.key
	# Create the DH parameters file using the predefined ffdhe2048 group
	echo '-----BEGIN DH PARAMETERS-----
MIIBCAKCAQEA//////////+t+FRYortKmq/cViAnPTzx2LnFg84tNpWp4TZBFGQz
+8yTnc4kmz75fS/jY2MMddj2gbICrsRhetPfHtXV/WVhJDP1H18GbtCFY2VVPe0a
87VXE15/V8k1mE8McODmi3fipona8+/och3xWKE2rec1MKzKT0g6eXq8CrGCsyT7
YdEIqUuyyOP7uWrat2DX9GgdT0Kj3jlN9K5W7edjcrsZCwenyO4KbXCeAvzhzffi
7MA0BM0oNC9hkXL+nOmFg/+OTxIy7vKBg8P+OxtMb61zO7X8vC7CIAXFjvGDfRaD
ssbzSibBsu/6iGtCOGEoXJf//////////wIBAg==
-----END DH PARAMETERS-----' > /etc/openvpn/server/dh.pem
	# Generate server.conf
	echo "local $ip
port $port
proto $protocol
dev tun
ca ca.crt
cert server.crt
key server.key
dh dh.pem
auth SHA512
tls-crypt tc.key
topology subnet
server 10.8.0.0 255.255.255.0" > /etc/openvpn/server/server.conf
	# IPv6
	if [[ -z "$ip6" ]]; then
		echo 'push "redirect-gateway def1 bypass-dhcp"' >> /etc/openvpn/server/server.conf
	else
		echo 'server-ipv6 fddd:1194:1194:1194::/64' >> /etc/openvpn/server/server.conf
		echo 'push "redirect-gateway def1 ipv6 bypass-dhcp"' >> /etc/openvpn/server/server.conf
	fi
	echo 'ifconfig-pool-persist ipp.txt' >> /etc/openvpn/server/server.conf
	# DNS
	case "$dns" in
		1|"")
			# Locate the proper resolv.conf
			# Needed for systems running systemd-resolved
			if grep -q '^nameserver 127.0.0.53' "/etc/resolv.conf"; then
				resolv_conf="/run/systemd/resolve/resolv.conf"
			else
				resolv_conf="/etc/resolv.conf"
			fi
			# Obtain the resolvers from resolv.conf and use them for OpenVPN
			grep -v '^#\|^;' "$resolv_conf" | grep '^nameserver' | grep -oE '[0-9]{1,3}(\.[0-9]{1,3}){3}' | while read line; do
				echo "push \"dhcp-option DNS $line\"" >> /etc/openvpn/server/server.conf
			done
		;;
		2)
			echo 'push "dhcp-option DNS 8.8.8.8"' >> /etc/openvpn/server/server.conf
			echo 'push "dhcp-option DNS 8.8.4.4"' >> /etc/openvpn/server/server.conf
		;;
		3)
			echo 'push "dhcp-option DNS 1.1.1.1"' >> /etc/openvpn/server/server.conf
			echo 'push "dhcp-option DNS 1.0.0.1"' >> /etc/openvpn/server/server.conf
		;;
		4)
			echo 'push "dhcp-option DNS 208.67.222.222"' >> /etc/openvpn/server/server.conf
			echo 'push "dhcp-option DNS 208.67.220.220"' >> /etc/openvpn/server/server.conf
		;;
		5)
			echo 'push "dhcp-option DNS 9.9.9.9"' >> /etc/openvpn/server/server.conf
			echo 'push "dhcp-option DNS 149.112.112.112"' >> /etc/openvpn/server/server.conf
		;;
		6)
			echo 'push "dhcp-option DNS 94.140.14.14"' >> /etc/openvpn/server/server.conf
			echo 'push "dhcp-option DNS 94.140.15.15"' >> /etc/openvpn/server/server.conf
		;;
	esac
	echo "keepalive 10 120
cipher AES-256-CBC
user nobody
group $group_name
persist-key
persist-tun
status openvpn-status.log
verb 3
crl-verify crl.pem" >> /etc/openvpn/server/server.conf
	if [[ "$protocol" = "udp" ]]; then
		echo "explicit-exit-notify" >> /etc/openvpn/server/server.conf
	fi
	# Enable net.ipv4.ip_forward for the system
	echo 'net.ipv4.ip_forward=1' > /etc/sysctl.d/30-openvpn-forward.conf
	# Enable without waiting for a reboot or service restart
	echo 1 > /proc/sys/net/ipv4/ip_forward
	if [[ -n "$ip6" ]]; then
		# Enable net.ipv6.conf.all.forwarding for the system
		echo "net.ipv6.conf.all.forwarding=1" >> /etc/sysctl.d/30-openvpn-forward.conf
		# Enable without waiting for a reboot or service restart
		echo 1 > /proc/sys/net/ipv6/conf/all/forwarding
	fi
	if systemctl is-active --quiet firewalld.service; then
		# Using both permanent and not permanent rules to avoid a firewalld
		# reload.
		# We don't use --add-service=openvpn because that would only work with
		# the default port and protocol.
		firewall-cmd --add-port="$port"/"$protocol"
		firewall-cmd --zone=trusted --add-source=10.8.0.0/24
		firewall-cmd --permanent --add-port="$port"/"$protocol"
		firewall-cmd --permanent --zone=trusted --add-source=10.8.0.0/24
		# Set NAT for the VPN subnet
		firewall-cmd --direct --add-rule ipv4 nat POSTROUTING 0 -s 10.8.0.0/24 ! -d 10.8.0.0/24 -j SNAT --to "$ip"
		firewall-cmd --permanent --direct --add-rule ipv4 nat POSTROUTING 0 -s 10.8.0.0/24 ! -d 10.8.0.0/24 -j SNAT --to "$ip"
		if [[ -n "$ip6" ]]; then
			firewall-cmd --zone=trusted --add-source=fddd:1194:1194:1194::/64
			firewall-cmd --permanent --zone=trusted --add-source=fddd:1194:1194:1194::/64
			firewall-cmd --direct --add-rule ipv6 nat POSTROUTING 0 -s fddd:1194:1194:1194::/64 ! -d fddd:1194:1194:1194::/64 -j SNAT --to "$ip6"
			firewall-cmd --permanent --direct --add-rule ipv6 nat POSTROUTING 0 -s fddd:1194:1194:1194::/64 ! -d fddd:1194:1194:1194::/64 -j SNAT --to "$ip6"
		fi
	else
		# Create a service to set up persistent iptables rules
		iptables_path=$(command -v iptables)
		ip6tables_path=$(command -v ip6tables)
		# nf_tables is not available as standard in OVZ kernels. So use iptables-legacy
		# if we are in OVZ, with a nf_tables backend and iptables-legacy is available.
		if [[ $(systemd-detect-virt) == "openvz" ]] && readlink -f "$(command -v iptables)" | grep -q "nft" && hash iptables-legacy 2>/dev/null; then
			iptables_path=$(command -v iptables-legacy)
			ip6tables_path=$(command -v ip6tables-legacy)
		fi
		echo "[Unit]
Before=network.target
[Service]
Type=oneshot
ExecStart=$iptables_path -t nat -A POSTROUTING -s 10.8.0.0/24 ! -d 10.8.0.0/24 -j SNAT --to $ip
ExecStart=$iptables_path -I INPUT -p $protocol --dport $port -j ACCEPT
ExecStart=$iptables_path -I FORWARD -s 10.8.0.0/24 -j ACCEPT
ExecStart=$iptables_path -I FORWARD -m state --state RELATED,ESTABLISHED -j ACCEPT
ExecStop=$iptables_path -t nat -D POSTROUTING -s 10.8.0.0/24 ! -d 10.8.0.0/24 -j SNAT --to $ip
ExecStop=$iptables_path -D INPUT -p $protocol --dport $port -j ACCEPT
ExecStop=$iptables_path -D FORWARD -s 10.8.0.0/24 -j ACCEPT
ExecStop=$iptables_path -D FORWARD -m state --state RELATED,ESTABLISHED -j ACCEPT" > /etc/systemd/system/openvpn-iptables.service
		if [[ -n "$ip6" ]]; then
			echo "ExecStart=$ip6tables_path -t nat -A POSTROUTING -s fddd:1194:1194:1194::/64 ! -d fddd:1194:1194:1194::/64 -j SNAT --to $ip6
ExecStart=$ip6tables_path -I FORWARD -s fddd:1194:1194:1194::/64 -j ACCEPT
ExecStart=$ip6tables_path -I FORWARD -m state --state RELATED,ESTABLISHED -j ACCEPT
ExecStop=$ip6tables_path -t nat -D POSTROUTING -s fddd:1194:1194:1194::/64 ! -d fddd:1194:1194:1194::/64 -j SNAT --to $ip6
ExecStop=$ip6tables_path -D FORWARD -s fddd:1194:1194:1194::/64 -j ACCEPT
ExecStop=$ip6tables_path -D FORWARD -m state --state RELATED,ESTABLISHED -j ACCEPT" >> /etc/systemd/system/openvpn-iptables.service
		fi
		echo "RemainAfterExit=yes
[Install]
WantedBy=multi-user.target" >> /etc/systemd/system/openvpn-iptables.service
		systemctl enable --now openvpn-iptables.service
	fi
	# If SELinux is enabled and a custom port was selected, we need this
	if sestatus 2>/dev/null | grep "Current mode" | grep -q "enforcing" && [[ "$port" != 1194 ]]; then
		# Install semanage if not already present
		if ! hash semanage 2>/dev/null; then
			if [[ "$os_version" -eq 7 ]]; then
				# Centos 7
				yum install -y policycoreutils-python
			else
				# CentOS 8 or Fedora
				dnf install -y policycoreutils-python-utils
			fi
		fi
		semanage port -a -t openvpn_port_t -p "$protocol" "$port"
	fi
	# If the server is behind NAT, use the correct IP address
	[[ -n "$public_ip" ]] && ip="$public_ip"
	# client-common.txt is created so we have a template to add further users later
	echo "client
dev tun
proto $protocol
remote $ip $port
resolv-retry infinite
nobind
persist-key
persist-tun
remote-cert-tls server
auth SHA512
cipher AES-256-CBC
ignore-unknown-option block-outside-dns
block-outside-dns
verb 3" > /etc/openvpn/server/client-common.txt
	# Enable and start the OpenVPN service
	systemctl enable --now openvpn-server@server.service
	# Generates the custom client.ovpn
	new_client
	echo
	echo "Finished!"
	echo
	echo "The client configuration is available in:" ~/"$client.ovpn"
	echo "New clients can be added by running this script again."
else
	clear
	echo "OpenVPN is already installed."
	echo
	echo "Select an option:"
	echo "   1) Add a new client"
	echo "   2) Revoke an existing client"
	echo "   3) Remove OpenVPN"
	echo "   4) Exit"
	read -p "Option: " option
	until [[ "$option" =~ ^[1-4]$ ]]; do
		echo "$option: invalid selection."
		read -p "Option: " option
	done
	case "$option" in
		1)
			echo
			echo "Provide a name for the client:"
			read -p "Name: " unsanitized_client
			client=$(sed 's/[^0123456789abcdefghijklmnopqrstuvwxyzABCDEFGHIJKLMNOPQRSTUVWXYZ_-]/_/g' <<< "$unsanitized_client")
			while [[ -z "$client" || -e /etc/openvpn/server/easy-rsa/pki/issued/"$client".crt ]]; do
				echo "$client: invalid name."
				read -p "Name: " unsanitized_client
				client=$(sed 's/[^0123456789abcdefghijklmnopqrstuvwxyzABCDEFGHIJKLMNOPQRSTUVWXYZ_-]/_/g' <<< "$unsanitized_client")
			done
			cd /etc/openvpn/server/easy-rsa/
			EASYRSA_CERT_EXPIRE=3650 ./easyrsa build-client-full "$client" nopass
			# Generates the custom client.ovpn
			new_client
			echo
			echo "$client added. Configuration available in:" ~/"$client.ovpn"
			exit
		;;
		2)
			# This option could be documented a bit better and maybe even be simplified
			# ...but what can I say, I want some sleep too
			number_of_clients=$(tail -n +2 /etc/openvpn/server/easy-rsa/pki/index.txt | grep -c "^V")
			if [[ "$number_of_clients" = 0 ]]; then
				echo
				echo "There are no existing clients!"
				exit
			fi
			echo
			echo "Select the client to revoke:"
			tail -n +2 /etc/openvpn/server/easy-rsa/pki/index.txt | grep "^V" | cut -d '=' -f 2 | nl -s ') '
			read -p "Client: " client_number
			until [[ "$client_number" =~ ^[0-9]+$ && "$client_number" -le "$number_of_clients" ]]; do
				echo "$client_number: invalid selection."
				read -p "Client: " client_number
			done
			client=$(tail -n +2 /etc/openvpn/server/easy-rsa/pki/index.txt | grep "^V" | cut -d '=' -f 2 | sed -n "$client_number"p)
			echo
			read -p "Confirm $client revocation? [y/N]: " revoke
			until [[ "$revoke" =~ ^[yYnN]*$ ]]; do
				echo "$revoke: invalid selection."
				read -p "Confirm $client revocation? [y/N]: " revoke
			done
			if [[ "$revoke" =~ ^[yY]$ ]]; then
				cd /etc/openvpn/server/easy-rsa/
				./easyrsa --batch revoke "$client"
				EASYRSA_CRL_DAYS=3650 ./easyrsa gen-crl
				rm -f /etc/openvpn/server/crl.pem
				cp /etc/openvpn/server/easy-rsa/pki/crl.pem /etc/openvpn/server/crl.pem
				# CRL is read with each client connection, when OpenVPN is dropped to nobody
				chown nobody:"$group_name" /etc/openvpn/server/crl.pem
				echo
				echo "$client revoked!"
			else
				echo
				echo "$client revocation aborted!"
			fi
			exit
		;;
		3)
			echo
			read -p "Confirm OpenVPN removal? [y/N]: " remove
			until [[ "$remove" =~ ^[yYnN]*$ ]]; do
				echo "$remove: invalid selection."
				read -p "Confirm OpenVPN removal? [y/N]: " remove
			done
			if [[ "$remove" =~ ^[yY]$ ]]; then
				port=$(grep '^port ' /etc/openvpn/server/server.conf | cut -d " " -f 2)
				protocol=$(grep '^proto ' /etc/openvpn/server/server.conf | cut -d " " -f 2)
				if systemctl is-active --quiet firewalld.service; then
					ip=$(firewall-cmd --direct --get-rules ipv4 nat POSTROUTING | grep '\-s 10.8.0.0/24 '"'"'!'"'"' -d 10.8.0.0/24' | grep -oE '[^ ]+$')
					# Using both permanent and not permanent rules to avoid a firewalld reload.
					firewall-cmd --remove-port="$port"/"$protocol"
					firewall-cmd --zone=trusted --remove-source=10.8.0.0/24
					firewall-cmd --permanent --remove-port="$port"/"$protocol"
					firewall-cmd --permanent --zone=trusted --remove-source=10.8.0.0/24
					firewall-cmd --direct --remove-rule ipv4 nat POSTROUTING 0 -s 10.8.0.0/24 ! -d 10.8.0.0/24 -j SNAT --to "$ip"
					firewall-cmd --permanent --direct --remove-rule ipv4 nat POSTROUTING 0 -s 10.8.0.0/24 ! -d 10.8.0.0/24 -j SNAT --to "$ip"
					if grep -qs "server-ipv6" /etc/openvpn/server/server.conf; then
						ip6=$(firewall-cmd --direct --get-rules ipv6 nat POSTROUTING | grep '\-s fddd:1194:1194:1194::/64 '"'"'!'"'"' -d fddd:1194:1194:1194::/64' | grep -oE '[^ ]+$')
						firewall-cmd --zone=trusted --remove-source=fddd:1194:1194:1194::/64
						firewall-cmd --permanent --zone=trusted --remove-source=fddd:1194:1194:1194::/64
						firewall-cmd --direct --remove-rule ipv6 nat POSTROUTING 0 -s fddd:1194:1194:1194::/64 ! -d fddd:1194:1194:1194::/64 -j SNAT --to "$ip6"
						firewall-cmd --permanent --direct --remove-rule ipv6 nat POSTROUTING 0 -s fddd:1194:1194:1194::/64 ! -d fddd:1194:1194:1194::/64 -j SNAT --to "$ip6"
					fi
				else
					systemctl disable --now openvpn-iptables.service
					rm -f /etc/systemd/system/openvpn-iptables.service
				fi
				if sestatus 2>/dev/null | grep "Current mode" | grep -q "enforcing" && [[ "$port" != 1194 ]]; then
					semanage port -d -t openvpn_port_t -p "$protocol" "$port"
				fi
				systemctl disable --now openvpn-server@server.service
				rm -rf /etc/openvpn/server
				rm -f /etc/systemd/system/openvpn-server@server.service.d/disable-limitnproc.conf
				rm -f /etc/sysctl.d/30-openvpn-forward.conf
				if [[ "$os" = "debian" || "$os" = "ubuntu" ]]; then
					apt-get remove --purge -y openvpn
				else
					# Else, OS must be CentOS or Fedora
					yum remove -y openvpn
				fi
				echo
				echo "OpenVPN removed!"
			else
				echo
				echo "OpenVPN removal aborted!"
			fi
			exit
		;;
		4)
			exit
		;;
	esac
fi

Cutting a Table out of a mysqldump output file

I was restoring the backup of a MySQL 5.x server into MySQL 8.x server – and found out that it corrupt the MySQL 8.x ‘s mysql table

Which stores the usernames and passwords.

So I had to delete the mysql table from the backup, before trying to restore it again

Turn out it’s pretty easy, just will take some time since it’s a pretty big backup :

# search for beginning of 'mysql' table
cat backup.mysql | grep -n Current Database: `mysql`

# 155604:-- Current Database: `mysql`

# search for ending of 'mysql' table
tail -n +155604 backup.mysql | grep -n "Current Database"

# 1:  -- Current Database: `mysql`
# 916:-- Current Database: `phpmyadmin`

# cut that table out
head -155603 backup.mysql                > new.mysql
tail -n +$(( 155603+916 )) backup.mysql >> new.mysql

# voila !

Crontab runs on different timezone : here’s the fix

A few days ago I got reports that a server is running its cron jobs at strange times. Logged in, and indeed it was. A huge backup was running during peak hours. Saying that it disrupt people’s work is an understatement.

To my surprise, the explanation for this issue can not be found straightaway. Took some googling to find the cause. And even more time to find the correct solution.

So to cut the chase – /etc/localtime was a link to /usr/share/zoneinfo/America/NewYork

Changed it to /usr/share/zoneinfo/Asia/Jakarta – and voila, now the cronjobs are running at the correct times.

Hope it helps

XCTB – X Compression Tool Benchmarker

I deal with a lot of big files at work. While storage capacity is not infinite indeed. So it’s in my interest to keep the file sizes as low as possible.

One way to achieve that is by using compression. Especially when dealing with log files, or database archive, you can save a ton of space with the right compression tool.

But space saving is not the only consideration.

You also need to weighs in other factors. Such as :

  • File type : different tool will compress different type of file differently
  • CPU multi-core capabilities
  • Compression speed
  • Compression size
  • Decompression time

But there are so many great compression tools available in Unix / Linux. It can be really confusing to choose which one to use even for a seasoned expert.

So I created X Compression Tool Benchmarker to help with this.

Features :

  • Test any kind of file : just put the file’s name as the parameter when calling the script. Then it will be tested against all the specified compression tools.
  • Add more compression tool easily : just edit the compressor_list & ext_file variable, and that’s it
  • Fire and forget : just run the script, and forget it. It will run without needing any intervention
  • CSV output : ready to be opened with Libre Office / Excel, and made into graphs in seconds.

Here’s a sample result for a Database archive file (type MySQL dump) :

The bar chart on top of this article is based from this result.

As you can see, currently this script will benchmark the following compression tools automatically : pigz – gzip – bzip2 – pbzip2 – lrzip – rzip – zstd – pixz – plzip – xz

The result, for each different file types, may surprise you πŸ™‚

For example ; I was surprised to see rzip beat lrzip – because lrzip is supposed to be the enhancement of rzip.

Then I was even more surprised to find out that :

  • I was testing Debian Buster’s version of rzip, which turned out to be pretty old – it does not even have multi-thread/core capability
  • But when I tested the latest version of rzip, which can use all the 16 cores in my server – it turned out to be slower than the old rzip from Debian Buster !
  • No, disk speed is not an issue – I made sure that all the benchmark was run from NVME SSD

So I was grinning at how Debian Buster packaged a very old version of rzip instead of the new one – turned out the joke’s on me : the old rzip perform better than the new one. Even without the multi-core capability.

Also it was amazing to see how really REALLY fast zstd is, while still giving decent compression size. When you absolutely need compression speed, this not so well known compression tool turned out to be the clear winner.

And so on, etc

Yes, indeed I had fun πŸ™‚

I hope you will too. Enjoy !


UPDATE : My friend , Eko Juniarto, published his results here and have permitted me to publish it here as well – thanks. Very interesting, indeed.

Setup Varnish on Port 80

Sometimes you need to quickly setup Varnish, usually in an emergency (like, your website got featured on Reddit’s frontpage πŸ˜€ ), to quickly absorb most of the hits hitting your website.

But the webserver is already using port 80.
Now what ?

Pretty easy actually :

  1. Setup Varnish on other port, say, 6081
  2. Run an iptables command : to forward incoming traffic from port 80 to port 6081
  3. Make sure Varnish uses 127.0.0.1:80 as the backend

Presto – now all the traffic hits Varnish first – which will process them in lightning speed.

Alright, so here’s the gory detail, also available on Pastebin.com : https://pastebin.com/2UBD7s05

Enjoy !

========

apt-get update ; apt-get -y install varnish

# Varnish should be already configured to list on port 6081
# if in doubt, check /etc/default/varnish,
# and look for the following line :
# DAEMON_OPTS="-a :6081

# edit varnish config
vi /etc/varnish/default.vcl

# make sure the .port line is set to 80, like this :
# .port = "80";
# then save & exit

# enable Apache's expires & headers module
a2enmod expires
a2enmod headers

# setup caching for static files
# via .htaccess file
echo "Header unset ETag" >> /var/www/.htaccess
echo "FileETag None" >> /var/www/.htaccess
echo "<ifmodule mod_expires.c>" >> /var/www/.htaccess
echo "<filesmatch \"(?i)^.*\\.(ico|flv|jpg|jpeg|png|gif|js|css)$\">" >> /var/www/.htaccess
echo "ExpiresActive On" >> /var/www/.htaccess
echo "ExpiresDefault \"access plus 2 minute\"" >> /var/www/.htaccess
echo "</filesmatch>" >> /var/www/.htaccess
echo "</ifmodule>" >> /var/www/.htaccess

# enable caching in php.ini
vi /etc/php/7.0/apache2/php.ini

# make sure session.cache_limiter = public
# save & exit

# restart Apache
/etc/init.d/apache2 restart

###### now let's start forwarding traffic to Varnish ######

# enable port forwarding
echo 1 > /proc/sys/net/ipv4/ip_forward
vi /etc/sysctl.conf

# add this line at the end of the file :
# net.ipv4.ip_forward = 1

# now here's the command that will actually forward the traffic from port 80 to Varnish
# change eth0 to your computer's network interface name
iptables -A PREROUTING -t nat -i eth0 -p tcp --dport 80 -j REDIRECT --to-port 6081

# make sure this iptables setting will become permanent
apt-get -y install iptables-persistent

WordPress Auto-Backup via SSH

This script will enable you to backup your WordPress websites automatically. Just put it in a crontab / automatic scheduling software somewhere.

Also available on Pastebin : https://pastebin.com/nZ2fiL8j

Enjoy.

#!/bin/bash

# wordpress-auto-backup.sh

### THIS SCRIPT ASSUMES THE FOLLOWING
# 1/ You can do SSH password-less login to the server
# How : https://easyengine.io/tutorials/linux/passwordless-authentication-ssh/
# 2/ You have created a correct ~/.my.cnf file
# How : https://easyengine.io/tutorials/mysql/mycnf-preference/

### RUNTIME PARAMETERS
# wordpress-auto-backup.sh <server address> <home directory> <backup directory>

### HOW IT WORKS 
# 1/ SSH to server
# 2/ read wp-config file & get details
# 3/ create backup_dir/web
# 4/ rsync home_dir backup_dir/web 
# 5/ backup database to backup_dir/web/today.mysql
# 6/ compress backup_dir/web to backup_dir/backup_today.bz2 

### choose backup retention
# backup retention: weekly
today=`date +%A`
# backup retention: monthly
#today=`date +%d`

compressor1='gzip'
compressor2='pbzip2'

#============= START BACKUP =======================

# to help making this code more readable
server=$1
home_dir=$2
backup_dir=$3

# get the variables
ssh $server "cat $home_dir/wp-config.php" > /tmp/$server$today.txt

db_name=`cat /tmp/$server$today.txt | grep DB_NAME | cut -d"'" -f 4`

db_user=`cat /tmp/$server$today.txt | grep DB_USER | cut -d"'" -f 4`

db_pass=`cat /tmp/$server$today.txt | grep DB_PASSWORD | cut -d"'" -f 4`

db_host=`cat /tmp/$server$today.txt | grep DB_HOST | cut -d"'" -f 4`

table_prefix=''
table_prefix=`cat /tmp/$server$today.txt | grep table_prefix | cut -d"'" -f 2`

# debug
#echo $db_name $db_user $db_pass $db_host $table_prefix


# delete temporary file
rm /tmp/$server$today.txt

# backup database
ssh $server "mysqldump -h $db_host -u $db_user --password=\"$db_pass\" $db_name \$(mysql -h $db_host -u $db_user --password=\"$db_pass\" -D $db_name -Bse \"show tables like '$table_prefix%'\") > $home_dir/db-$today.mysql"

# compress database dump
ssh $server "$compressor1 $home_dir/db-$today.mysql"

# download everything 
mkdir $backup_dir/web/
rsync -avuz $server:$home_dir/* $backup_dir/web/

# make backup file
tar cvf $backup_dir/$server-$today.tar $backup_dir/web/

$compressor2 $backup_dir/$server-$today.tar &

# clean up
ssh $server "rm $home_dir/db-$today.mysql.gz"

# done !


Cara Bertanya Yang Baik

Ketika sedang browsing di Internet, tidak sengaja menemukan artikel ini. Wow πŸ™‚ Artikel ini sudah lama sekali saya tulis. Saya sudah lupa persisnya, jejak yang saya temukan di Google menunjukkan bahwa artikel tsb sudah ada di November 2004.

Anyway, artikel ini kemudian banyak dikutip di berbagai milis & forum di Internet. Namun, justru belum ada di blog saya sendiri πŸ™‚ Maka dengan ini saya membetulkan kekeliruan tersebut πŸ˜€

Selamat menikmati.

====================================

Cara bertanya yang baik

Oleh: Harry Sufehmi
http://www.pangsit.com


Pernahkah Anda bertanya di suatu forum atau mailing list komputer di Internet, namun tidak dijawab oleh seorang pun ? Atau mungkin malah ada yang meledek Anda?

Jangan kaget, cara Anda bertanya dapat sangat mempengaruhi respons yang akan Anda dapatkan. Jika cara Anda benar, maka di forum yang sama bisa jadi malah orang-orang seperti menjadi saling berebutan untuk membantu Anda.

Anda hanya perlu menempatkan diri Anda pada posisi mereka (anggota-anggota forum lainnya), dan berpikir, kira-kira pertanyaan seperti apa yang saya akan jawab dengan senang hati?

FAKTA UTAMA:

Para anggota forum saling membantu satu dengan lainnya tanpa bayaran. Kebalikannya, justru mereka mengorbankan waktu dan pikiran untuk menolong Anda.

Buatlah agar mereka merasa tergerak untuk menjawab pertanyaan Anda, dengan melakukan langkah-langkah berikut ini.

Persiapan sebelum bertanya

  1. Coba baca lagi dokumentasi produk tersebut baik-baik
  2. Coba cari dahulu jawabannya dengan mencarinya di Internet (via Google, dll)
  3. Coba cari jawabannya di arsip mailing list dari produk tersebut (kalau jawabannya sudah ada di arsip, kadang-kadang orang akan menjadi jengkel dengan pertanyaan Anda)
  4. Dan seterusnya pada intinya; jangan lupa tunjukkan bahwa Anda sudah berusaha untuk memecahkan masalah tersebut.Karena jika Anda tidak menyertakan bukti-bukti usaha Anda, maka orang lain cenderung melihat Anda sebagai pemalas dan tidak merasa tergugah untuk membantu Anda.

Kemudian, cari tahu tempat yang tepat untuk menanyakan pertanyaan Anda tersebut. Pertanyaan mengenai programming akan cenderung diabaikan, atau malah akan mengundang kecaman, jika diposting di forum mengenai perangkat keras.

Cross-posting (memposting pertanyaan ke banyak forum sekaligus) cenderung membuat orang menjadi malas menjawab pertanyaan Anda (“ah, paling forum anu yang akan menjawabnya”)

Kalaupun Anda merasa betul-betul perlu untuk memposting pertanyaan tersebut ke beberapa forum sekaligus, maka kirimkan sebagai satu buah email untuk setiap forum.

Ketika bertanya

Jangan bertanya langsung ke individu.
Bertanya ke forum/mailing list adalah lebih baik, karena:

  1. Jawaban dari pertanyaan Anda tersebut jadi bisa bermanfaat untuk banyak orang
  2. Jawaban dari pertanyaan Anda biasanya akan tersimpan di arsip forum tersebut, sehingga akan terus bermanfaat bagi orang lain (muncul di hasil search Google, dst)
  3. Poin-poin diatas menjadi insentif bagi para pakar di forum tersebut untuk menjawab pertanyaan Anda
  4. Anggota forum dapat bekerja sama untuk membantu menjawab pertanyaan Anda
  5. Dan, email yang dikirim langsung dari seseorang yang tidak dikenal cenderung membuat penerimanya menjadi terasa terganggu.

Cara bertanya yang baik

  • Gunakan bahasa yang sopan
    Jika Anda menggunakan kata-kata yang kasar, adalah hal yang aneh jika kemudian Anda heran ketika tidak ada yang menjawab pertanyaan Anda Γ‚Β πŸ™‚
    Gunakan kata-kata seperti “Apakah ada yang bisa membantu saya?”, “Terimakasih banyak sebelumnya”, dst.
    Ingat bahwa para pakar tersebut tidak menerima bayaran untuk membantu Anda, jadi setidak-tidaknya jangan lupa mengucapkan terimakasih kepada mereka.
  • Jangan asumsikan bahwa Anda berhak mendapatkan jawaban.
    Ingat FAKTA UTAMA.
    Karena jika Anda telah berasumsi begini, maka Anda akan kecewa sendiri ketika pertanyaan Anda tidak terjawab, dan alih-alih berusaha introspeksi kenapa tidak ada jawaban Anda malah akan cenderung menjadi marah-marah di forum tersebut dan semakin diabaikan oleh hadirin lainnya (atau kena caci maki balik).
  • Beri judul yang sesuai dan deskriptif.
    Judul email seperti “tolooongg!!!!” justru cenderung akan diabaikan, karena memberikan kesan bahwa Anda terlalu malas bahkan sekedar cuma memberi judul email yang sesuai.
    Judul email seperti “Komputer restart sendiri setelah memasang Service Pack 3” akan mempunyai kans untuk dijawab yang lebih besar.
  • Jelaskan masalah Anda secara detil berikut dengan berbagai data-data yang ada.
    INGAT bahwa para pakar di forum tersebut tidak bisa mengakses komputer Anda, jadi sumber informasi mereka hanya email dari Anda saja. Maka buatlah email tersebut selengkap dan sedetail mungkin.
  • Buat agar email Anda informatif, dan tidak asal panjang lebar
    Sehubungan dengan poin diatas, melampirkan data-data yang tidak relevan sehingga membuat email Anda menjadi sangat panjang malah justru akan membuat para pakar merasa segan untuk menjawab pertanyaan Anda. (“ya ampun sudah lama-lama download email dia ternyata isinya cuma beginian” delete!!!)
  • Tulis pertanyaan Anda dengan bahasa Indonesia yang benar.
    Penulisan pertanyaan yang amburadul akan memberikan kesan bahwa Anda adalah orang yang ceroboh, dan para pakar yang sibuk akan merasa segan untuk meluangkan waktunya bagi Anda
  • Jangan langsung mengklaim bahwa kesalahan ada pada pihak yang lain.
    Kalimat seperti “ada bug di program akunting ini” tanpa bukti yang kuat akan cenderung membuat para pembuat program tersebut (yang jelas adalah para pakarnya) menjadi tidak tertarik untuk menjawab pertanyaan Anda, atau malah tersinggung.
    Cukup jelaskan saja bahwa Anda menemukan suatu masalah di program tersebut, jangan membuat klaim yang tidak bisa Anda buktikan.
  • Jelaskan dan paparkan masalahnya, bukan tebakan Anda
    Jika Anda bukan pakar di bidang tersebut, maka kemungkinan besar tebakan Anda salah, dan malah menunjukkan kebodohan Anda sendiri di depan umum.
  • Buat kesimpulan setelah permasalahan Anda terjawab
    Setelah pertanyaan Anda terjawab / masalah Anda terselesaikan, kirim satu email lagi ke forum yang membeberkan apa saj ayang dilakukan untuk menyelesaikan masalah tersebut.Ini akan meningkatkan kemungkinan dijawabnya pertanyaan Anda yang berikutnya di forum tersebut, karena para pakar forum akan menilai bahwa Anda bisa juga memberi balik (dan tidak hanya meminta) dan mereka pada umumnya sangat menghargai ini.

Menanggapi jawaban

Jawaban yang menyelesaikan permasalahan Anda tentu perlu dibalas paling tidak dengan ucapan terimakasih. Namun bagaimana dengan jawaban:

  1. RTFM atau STFW
    Balasan berupa sepatah kata RTFM (Read The Fine Manual) atau STFW (Search The Fine Web) berarti bahwa Anda telah melakukan kesalah yang fatal jawabannya sebetulnya sudah ada di dokumentasi produk tersebut (RTFM), atau di Internet (STFW) Jangan tersinggung, karena ini fakta (Anda melakukan kesalahan etika).
  2. Jika ada yang menjawab dengan kasar, biarkan saja.
    Karena yang menurut Anda kasar, kadang justru adalah biasa di forum tersebut. Atau ada alasan yang kuat mengapa balasannya seperti itu. Atau mungkin Anda sedang emosi sehingga balasan tersebut terasa kasar bagi Anda.Dan berbagai kemungkinan lainnya.
    Yang lebih bijak adalah menenangkan diri Anda, dan lalu menjawab balasan tersebut dengan kepala dingin. Jangan emosional, sampaikan data dan fakta saja.

Jika jawaban yang Anda terima tidak berkenan bagi Anda, jangan tersinggung dan marah-marah karena:

  1. Kemungkinan Anda akan mengatakan hal-hal yang memalukan Anda sendiri, padahal kebanyakan forum dan mailing list terarsip di Internet., dan bisa dilihat oleh seluruh penduduk dunia.
    Tindakan Anda bertahun-tahun yang lalu dapat memalukan Anda selama bertahun-tahun setelahnya.
  2. Para pakar di forum tersebut akan mengingat Anda sebagai orang yang tidak pantas untuk dibantu di masa depan

Yang lebih baik adalah Anda introspeksi diri Anda sendiri, apakah ada etika-etika bertanya yang telah Anda langgar? Silahkan baca lagi petunjuk ini baik-baik.

Jika rasanya Anda telah cukup berhati-hati dan berusaha, namun masih tetap dimaki-maki, berarti memang forum tersebut bukan forum yang tepat. Tapi jangan dibalas, karena Anda sendiri yang akan kena getahnya. Cukup cari saja forum lainnya. Dunia tidak selebar daun kelor.

Jika tidak ada yang menjawab pertanyaan Anda

  1. Jangan tersinggung
    Mungkin memang tidak ada yang mengetahui jawabannya.
    Tidak ada yang tahu jawabannya bukan berarti Anda diabaikan, walaupun memang sulit untuk membedakannya (karena sifat komunikasi elektronik yang faceless)
  2. Jangan posting ulang pertanyaan Anda
    Para pakar di forum tersebut, yang mengasumsikan bahwa kebetulan tidak ada yang mengetahui jawaban dari masalah Anda, akan merasa kesal (“cerewet benar orang ini”)
    Sebaliknya, cari jawabannya di forum yang lain.

Contoh-contoh pertanyaan yang baik dan yang salah

Salah: Dimana saya bisa menemukan program anu ? (ya di Google, dogol)
Baik: Saya mencari program anu di Google, tapi tidak ada yang relevan / justru ketemu situs-situs mengenai produk anu. Apakah ada yang bisa membantu menunjukkan saya ke informasi mengenai cara untuk menggunakan fasilitas X di program anu tersebut ?

Salah: Bagaimana cara untuk install Linux ? (RTFM!!!)
Baik: Saya sedang meng-install Mandrake versi 9.2, namun saat sedang mendeteksi network card malah jadi hang. Network card saya merk D-link tipe TX530. (informasi jelas, detail, dan relevan).

Saya sudah coba cari di Google dan http://www.mandrakeuser.org, namun tidak ada informasi mengenai hal ini. (penanya jelas sudah berusaha, namun masih belum berhasil juga)
Ada yang tahu bagaimana solusinya ?

Salah: Motherboard saya gak mau hidup, gemana nehhh… ??!! (Loe mau bayar gue berapa emangnya?)
Baik: Komputer saya tidak mau hidup setelah saya pasangi card Radeon 9800XT. Ada bunyi bip 3 kali sewaktu saya menekan tombol power. Sayang tidak ada informasi mengenai bunyi bip ini di manual dan website motherboard saya. Motherboard saya merek Epox tipe XXX-321. Ada yang bisa membantu saya?

Untuk para pakar: Cara menjawab yang baik

  1. Usahakan untuk memahami situasi penanya
    Stress karena masalah yang sedang dialami dapat membuat penanya menjadi tidak sengaja membuat email yang terbaca kasar / egois. Lebih bijak jika kita memahami, dan membantu mereka.
  2. Jika tidak tahu, katakan saja tidak tahu !
    Jawaban yang salah namun terkesan canggih justru jauh lebih buruk daripada tidak ada jawaban sama sekali, karena akan menyesatkan si penanya. Dan kemudian akan menjatuhkan reputasi Anda sebagai pakar di forum yang bersangkutan.
  3. Jangan ledek seseorang karena ketidak tahuannya
    Anda dulu juga pernah bodoh seperti mereka. Jangan sombong.
  4. Jika informasi yang ada kurang, jangan segan-segan untuk bekerjasama dengan penanya sampai masalahnya terpecahkan.Ingatkah ketika dulu Anda masih bodoh, dan orang-orang membantu Anda dengan senang hati? Bantuan Anda kepada si penanya mudah-mudahan dapat membuatnya menjadi pakar pula di kemudian hari, yang juga senang membantu orang lain yang tidak tahu.
  5. Jawaban RTFM atau STFW memang kadang-kadang pantas untuk dikenakan kepada penanya-penanya tertentu, namun adalah jauh lebih baik jika Anda bisa menyertakan link/URL ke website yang relevan.
    Bahkan terkadang sekedar memberikan keyword yang tepat untuk dimasukkan di Google (http://www.google.com) sebetulnya adalah bantuan yang sangat berharga bagi sang penanya!
  6. Jika ada fasilitas FAQ di forum Anda, jangan lupa untuk mendokumentasikan pertanyaan-pertanyaan yang sering muncul disitu.
    Para calon penanya terbantu karena jawabannya bisa didapatkan dengan cepat, dan Anda sendiri juga akan terbantu karena volume pertanyaan menjadi berkurang

Demikian pedoman ini kami susun, semoga bisa bermanfaat bagi Anda.

Credit:
(#) Inspirasi dari How To Ask Questions The Smart Way (http://www.catb.org/~esr/faqs/smart-questions.html),
oleh Eric Steven Raymond
(#) Di copy kembali dari artikel Wiki @ http://wiki.linux.or.id , yang disimpan di Internet Archive.
.

MySQL : Quick Recipes

Sebagai seorang DBA (Database Administrator) yang banyak berkecimpung antara lain dengan MySQL, disini saya akan menuliskan berbagai catatan “resep-resep” MySQL yang sering digunakan.

Resep-resep ini bersifat instan, yaitu bisa langsung Anda copas (copy-paste) di layar Terminal server.
Tentunya setelah menyesuaikan berbagai variable yang ada (username, password, dst)

Selamat menikmati πŸ™‚


PERSIAPAN

Jalankan perintah-perintah beriku ini, agar Anda bisa langsung menjalankan berbagai resep yang ada disini :


### persiapan agar bisa menjalankan mysql (client)
### tanpa perlu memasukkan password lagi
echo "[client]" > ~/.my.cnf
echo "user = root" >> ~/.my.cnf
echo "pass = yourpassword" >> ~/.my.cnf


BENCHMARK DATABASE


mysqlslap --user=root --password="rahasiasaya" --host=10.0.8.8 --concurrency=50 --number-of-queries=100000 --auto-generate-sql-unique-query-number=100000 --auto-generate-sql --auto-generate-sql-add-autoincrement --auto-generate-sql-load-type=key

# contoh hasil benchmark :
# Benchmark
# Average number of seconds to run all queries: 4.031 seconds
# Minimum number of seconds to run all queries: 4.031 seconds
# Maximum number of seconds to run all queries: 4.031 seconds
# Number of clients running queries: 50
# Average number of queries per client: 2000

Pada contoh diatas, ada 100.000 query yang dijalankan, dan membutuhkan waktu 4 detik = 25.000 query / detik.

Panduan lebih detail seputar mysqlslap :
http://dev.mysql.com/doc/refman/5.5/en/mysqlslap.html


RECOVER ROOT USER


sudo /etc/init.d/mysql stop
sudo mysqld_safe --skip-grant-tables &

mysql -e "use mysql; update user set password=PASSWORD("NEW-ROOT-PASSWORD") where User='root'; flush privileges;"

sudo /etc/init.d/mysql stop
sudo /etc/init.d/mysql start


CREATE A NEW DATABASE & USER


# bikin database & user baru
mysql -e "create user newuser; create database newdatabase;"

# beri newuser akses full ke newdatabase
mysql -e "use mysql; update user set password=PASSWORD('newpassword') where User='newuser'; GRANT ALL PRIVILEGES ON newdatabase.* To 'newuser'@'localhost' IDENTIFIED BY 'newpassword'; flush privileges;"


SETUP MYSQL SERVER (dengan user biasa / bukan root)

Panduannya bisa dibaca disini : [ Install MySQL Server (tanpa root) ]


SETUP MYSQL CLUSTER (dengan user biasa / bukan root)

Panduannya bisa dibaca disini : [ Install MySQL Cluster (tanpa root) ]


SETUP AUTO BACKUP

Panduannya bisa dibaca disini : [ MySQL Archived Backup ]


SETUP REPLIKASI BERANTAI

Replikasi sering dianggap sebagai solusi untuk mengatasi beban kerja yang tinggi. Padahal, untuk banyak kasus, performa sebuah server MySQL sudah lebih dari mencukupi. Tidak perlu menggunakan replikasi lagi.

Replikasi justru paling bermanfaat sebagai fasilitas backup data yang selalu up to date. Dengan memasang fitur ini, maka kita jadi bisa memiliki backup database yang kemudian siap untuk berfungsi jika server database mengalami masalah.

Di resep ini, saya akan melakukan replikasi dengan alur sbb :
Server1 -> Server2 -> Server3

Ya, Server2 akan berfungsi sekaligus sebagai Slave (dari Server1) dan Master (untuk Server3)

Terlampir adalah resep untuk melakukan ini.
Perhatian, Anda perlu menyesuaikan variable-variable ini terlebih dahulu sebelum melakukan copy-paste di Terminal server ybs :

  • exampledb
  • server1
  • server2
  • server3
  • yourpassword
  • replicauser
  • replicapassword
  • Baris-baris “CHANGE MASTER”, yaitu variable MASTER_LOG_FILE dan MASTER_LOG_POS


########## SERVER1 ################
### install LAMP
sudo apt-get install phpmyadmin mysql-server

### persiapan agar bisa menjalankan mysql (client)
### tanpa perlu memasukkan password lagi
echo "[client]" > ~/.my.cnf
echo "user = root" >> ~/.my.cnf
echo "pass = yourpassword" >> ~/.my.cnf

### setting Master1
sudo bash -c 'echo server-id=1 >> /etc/mysql/my.cnf'
sudo bash -c 'echo log-bin = /var/log/mysql/mysql-bin.log >> /etc/mysql/my.cnf'
sudo bash -c 'echo bind-address = 0.0.0.0 >> /etc/mysql/my.cnf'

#### JANGAN lupa untuk hapus baris ini : bind-address = 127.0.0.1
#### jika tidak, maka slave tidak akan bisa connect ke Master1

### restart MySQL
/etc/init.d/mysql restart

### buat user untuk replikasi
mysql -e "GRANT REPLICATION SLAVE ON *.* TO 'replicauser'@'%' IDENTIFIED BY 'replicapassword'; FLUSH PRIVILEGES;"

### kunci database
mysql -e "FLUSH TABLES WITH READ LOCK;"

### catat output dari perintah berikut ini
mysql -e "SHOW MASTER STATUS;"

### outputnya seperti ini
#+------------------+----------+--------------+------------------+
#| File | Position | Binlog_Do_DB | Binlog_Ignore_DB |
#+------------------+----------+--------------+------------------+
#| mysql-bin.000001 | 618 | exampledb | |
#+------------------+----------+--------------+------------------+

### backup database tsb
mysqldump -u root -p --add-drop-database --databases exampledb > /tmp/exampledb.sql

### buka kembali kunci database
mysql -e "UNlOCK TABLES;"

########## SERVER2 ################
### install LAMP
sudo apt-get install phpmyadmin mysql-server

### persiapan agar bisa menjalankan mysql (client)
### tanpa perlu memasukkan password lagi
echo "[client]" > ~/.my.cnf
echo "user = root" >> ~/.my.cnf
echo "pass = yourpassword" >> ~/.my.cnf

### copy backup dari server1
scp -v root@server1:/tmp/exampledb.sql /tmp/exampledb.sql
mysql -u root -p < /tmp/exampledb.sql ### setting Slave1 / Master2 sudo bash -c 'echo server-id=2 >> /etc/mysql/my.cnf'
sudo bash -c 'echo replicate-do-db=exampledb >> /etc/mysql/my.cnf'

### restart MySQL
/etc/init.d/mysql restart

### mulai setting sebagai Slave1
mysql -e "SLAVE STOP;"

mysql -e "CHANGE MASTER TO MASTER_HOST='server1', MASTER_USER='replicauser', MASTER_PASSWORD='replicapassword', MASTER_LOG_FILE='mysql-bin.000001', MASTER_LOG_POS=618;"

mysql -e "START SLAVE;"

# ---------------------------------
### mulai setting sebagai Master2
sudo bash -c 'echo log-slave-updates >> /etc/mysql/my.cnf'
sudo bash -c 'echo relay-log=server1-relay-bin >> /etc/mysql/my.cnf'

### restart MySQL
/etc/init.d/mysql restart

### tunggu agar sempat sync dengan Master1
sleep 600

### buat user untuk replikasi
mysql -e "GRANT REPLICATION SLAVE ON *.* TO 'replicauser'@'%' IDENTIFIED BY 'replicapassword'; FLUSH PRIVILEGES;"

### kunci database
mysql -e "FLUSH TABLES WITH READ LOCK;"

### catat output dari perintah berikut ini
mysql -e "SHOW MASTER STATUS;"

### outputnya seperti ini
#+------------------+----------+--------------+------------------+
#| File | Position | Binlog_Do_DB | Binlog_Ignore_DB |
#+------------------+----------+--------------+------------------+
#| mysql-bin.000003 | 777 | exampledb | |
#+------------------+----------+--------------+------------------+

### backup database tsb
mysqldump -u root -p --add-drop-database --databases exampledb > /tmp/exampledb.sql

### buka kembali kunci database
mysql -e "UNlOCK TABLES;"

########## SERVER3 ################
### install LAMP
sudo apt-get install phpmyadmin mysql-server

### persiapan agar bisa menjalankan mysql (client)
### tanpa perlu memasukkan password lagi
echo "[client]" > ~/.my.cnf
echo "user = root" >> ~/.my.cnf
echo "pass = yourpassword" >> ~/.my.cnf

### copy backup dari server1
scp -v root@server2:/tmp/exampledb.sql /tmp/exampledb.sql
mysql -u root -p < /tmp/exampledb.sql ### setting Slave2 sudo bash -c 'echo server-id=3 >> /etc/mysql/my.cnf'
sudo bash -c 'echo replicate-do-db=exampledb >> /etc/mysql/my.cnf'

### restart MySQL
/etc/init.d/mysql restart

### mulai setting sebagai Slave1
mysql -e "SLAVE STOP;"

mysql -e "CHANGE MASTER TO MASTER_HOST='server2', MASTER_USER='replicauser', MASTER_PASSWORD='replicapassword', MASTER_LOG_FILE='mysql-bin.000003', MASTER_LOG_POS=777;"

mysql -e "START SLAVE;"

### restart MySQL
/etc/init.d/mysql restart

MEMPROMOSIKAN SERVER2 MENJADI MASTER


### set server2 = master
mysql -e "STOP SLAVE;"

### jangan lupa remark baris
### "log-slave-updates" & "relay-log"
### dari /etc/mysql/my.cnf

BERBAGAI SKEMA REPLIKASI LAINNYA

http://dev.mysql.com/doc/refman/5.1/en/replication-solutions-performance.html

http://dev.mysql.com/doc/refman/5.1/en/replication-solutions-switch.html

Presentasi soal MySQL Replication dari tim engineer Yahoo


PURGE BINARY LOGS

### Untuk hapus binlog jadul = hemat disk space
mysql -e "PURGE BINARY LOGS BEFORE '2012-11-01 00:00:01';"

Star Trek : Inspirasi Untuk Semua

Seperti banyak orang lainnya, awal perkenalan saya dengan seri Star Trek sangat mengesankan. Melihat berbagai pesawat luar angkasa & teknologi masa depan yang ditampilkan di berbagai serinya. Menakjubkan sekali melihat bagaimana manusia bisa bepergian dengan mudah tidak lagi hanya antar planet, namun bahkan antar bintang. Mesin teleport, yang bisa memindahkan benda & makhluk hidup dalam sekejap. Dan berbagai hal lainnya.

Sejalan dengan waktu, saya mulai menyadari bahwa ada banyak pelajaran yang bisa didapatkan dari setiap episodenya. Gene Roddenberry, pencipta seri ini, ternyata memang merancang seri ini untuk menyajikan 2 hal di setiap episodenya : “adventure story, and morality tale

Dikutip :

Roddenberry intended the show to have a highly progressive political agenda reflective of the emerging counter-culture of the youth movement, though he was not fully forthcoming to the networks about this. He wanted Star Trek to show humanity what it might develop into, if only it would learn from the lessons of the past, most specifically by ending violence.

An extreme example is the alien species, the Vulcans, who had a very violent past but learned to control their emotions. Roddenberry also gave Star Trek an anti-war message and depicted the United Federation of Planets as an ideal, optimistic version of the United Nations.

Dan memang sangat, amat mengesankan menyaksikan bagaimana umat manusia di film Star Trek ini menjadi umat yang satu : manusia. Tidak ada lagi suku anu & suku itu, ras ini & ras itu.
Semuanya sama, yaitu manusia; dan juga mendapatkan perlakuan & hak-hak yang sama. Ini adalah pemandangan yang sangat menyejukkan, di tengah-tengah berbagai konflik SARA yang terjadi setiap hari di berbagai penjuru bumi pada saat ini.

Selain itu, masih ada banyak lagi pelajaran yang bisa kita dapatkan dari berbagai episode Star Trek. Seperti :

  • Kepemimpinan : Tokoh utama di setiap film Star Trek adalah pemimpinnya. Ada kapten pesawat angkasa, seperti Kirk, Picard, Janeway, dan Archer. Atau pemimpin stasiun luar angkasa, seperti Benjamin Sisko.

    Dan setiap tokoh tersebut menampilkan kemampuan leadership yang luar biasa. Ketegasan, kemampuan bernegosiasi dengan semua pihak, delegasi, kontrol / pengawasan, empati, kesabaran, keberanian, pengorbanan untuk bawahannya, kemampuan mengambil keputusan dibawah tekanan — dan semuanya tetap dengan menjunjung prinsip-prinsip mereka, seperti prime directive, dll.

    Berbeda sekali dengan para pemimpin zaman sekarang, yang bisa membuang-pasang prinsip mereka, seperti sebuah celana dalam saja.
    Para pemimpin di Star Trek ini bisa lembut namun tetap tegas, bisa kompromi tanpa mengorbankan prinsip & etika, dan rela mati demi keselamatan anak buah mereka. Luar biasa.

  • Keadilan : ini adalah satu lagi tema yang kerap diangkat secara rutin di berbagai episode Star Trek. Keadilan berlaku tanpa pandang bulu. Hukum yang ada bisa diabaikan ketika bertentangan dengan keadilan.

    Sekilas terkesan unik & nyeleneh, tapi, seharusnya memang justru demikian. Berbeda dengan di Indonesia, yang menjunjung prinsip “superioritas hukum”. Sehingga, bisa terjadi hal-hal aneh seperti anak kecil dipenjara, orang miskin yang kelaparan ditangkap, dst. Dimana semuanya itu sudah sesuai dengan aturan & prosedur hukum. Namun, tentu saja bertentangan dengan keadilan.

  • Persamaan Derajat : Kalau kita ingat situasi di tahun 1966, yaitu ketika Star Trek mulai ditayangkan, maka film ini adalah sesuatu yang luar biasa.

    Di masa rasisme terhadap ras Afrika / negro masih sangat kental, salah satu tokoh utama di film Star Trek adalah orang hitam dan perempuan. Ingat bahwa negara Amerika yang katanya pro demokrasi itu sampai sekarang masih belum pernah punya presiden perempuan πŸ™‚
    Munculnya tokoh perempuan hitam di bridge, tempat pusat komando pesawat di Star Trek, menjadi inspirasi banyak orang. Salah satunya adalah Whoopi Goldberg, yang kemudian menjadi aktris terkenal, dan belakangan juga ikut serta di film seri Star Trek “Next Generations”.

    Tidak cukup demikian, juga ada tokoh dari Rusia (ingat, ini pada masa perang dingin / Cold War dengan Soviet), Scotland, dan Asia. Ini adalah hal yang luar biasa untuk sebuah seri TV.

    Star Trek mencoba menyampaikan pesan bahwa semua manusia itu sama derajat & haknya. Tidak ada toleransi terhadap rasisme di Star Trek.

    Malah kemudian Star Trek maju satu langkah lagi — setiap sentient being, makhluk hidup yang cerdas, itu sama derajat & haknya.
    Ini tentu saja cukup menggugah pikiran. Suatu hari, jika kita menemukan makhluk hidup cerdas lainnya selain manusia, maka kita sudah diingatkan oleh Star Trek untuk juga memperlakukan mereka dengan baik.

    Di tengah berbagai konflik ras & etnis di berbagai penjuru di dunia, pesan perdamaian dari Star Trek ini sangat menyejukkan bagi kita semua.

  • Honour : Sifat ksatria itu bukan cuma monopoli para tokoh di abad pertengahan. Para kapten & tokoh di film-film Star Trek menunjukkan bagaimana sifat ksatria dilakukan di berbagai situasi dan kondisi. Ketika mereka sudah berjanji, maka ucapan tersebut akan mereka pegang teguh. Ketika sudah ada suatu peraturan / prinsip, maka mereka berusaha keras untuk menegakkannya, walaupun berat & membahayakan nyawa.

    Dunia Star Trek adalah sebuah bentuk dunia yang nyaris ideal, dimana sebagian besar manusia sudah sangat beradab. Sehingga mereka jadi bisa menikmati kehidupan yang sangat nyaman & mencerahkan.

  • Kebebasan & Anti Penjajahan : Prinsip & hukum seperti Prime Directive jelas menunjukkan sikap anti penjajahan. Seperti larangan intervensi ke penduduk lokal, yang teknologinya belum maju. Dimana bangsa yang teknologinya lebih maju dapat menjajah yang lebih primitif dengan mudah, jika saja tidak ada Prime Directive ini.

    Pada era Perang Dingin, ketika Star Trek mulai dibuat, sikap ini cukup berkesan bagi banyak orang. Dan sekarang juga semakin relevan, terutama dengan sikap dari berbagai negara superpower seperti Amerika, yang dengan seenaknya menyerbu & merusak berbagai negara lainnya…

Masih ada banyak lagi pelajaran yang bisa kita tarik dari Star Trek, seperti dibahas Huffington Post disini. Atau versi komedinya seperti dibahas oleh Ashok Kumar di Slideshare, “10 Important Life Lessons from Star Trek” πŸ™‚

Dampak Positif Star Trek

Pada hari Sabtu 6 Oktober 2012, saya dan istri mampir ke acara komunitas IndoStarTrek, di mall Pacific Place. Di acara ini dibahas berbagai seri Star Trek dari awal sampai akhirnya.

Sangat terkesan melihat hadirin di acara ini, jelas nampak ada dari berbagai ras & etnis, agama, dan umur – ada anak-anak kecil juga yang hadir.
Malah penanya terbaik di acara ini adalah seorang anak yang berumur 11 tahun.

Salah satu pertanyaan paling berkesan bagi saya adalah, “apakah dampak positif Star Trek untuk kehidupan kita sehari-hari ?

Mari kita coba lihat bersama-sama :

  • Pro Persamaan / Anti Rasisme : Kita perlu ingat bahwa beberapa dekade yang lalu, dunia ini masih sangat berbeda. Amerika masih sangat rasis. Masih ada beberapa negara yang dijajah / baru lepas dari penjajahan.

    Star Trek membawa pesan kemanusiaan yang universal. Setiap umat manusia adalah sama, yaitu manusia. Ditampilkan dengan visualisasi yang apik, sehingga sangat berkesan bagi sangat banyak orang.

    Saat ini, situasi tersebut sudah jauh lebih membaik. Namun, pesan-pesan dari Star Trek masih tetap relevan. Masih ada banyak kebencian yang terpendam antara satu ras dengan ras lainnya. Antara satu etnis dengan etnis lainnya.

    Menyaksikan bagaimana umat manusia menjadi satu, dan berkali-kali nyaris punah berjuang mempertahankan hidup berhadapan dengan makhluk lainnya yang berbeda total, cukup menggugah dan memunculkan kesadaran. Bahwa kita semua adalah sama, manusia.

  • Inspirasi Teknologi : Sebelum sebuah teknologi baru bisa dibuat menjadi kenyataan, manusia sudah harus bisa membayangkannya terlebih dahulu. Film-film science fiction seperti Star Trek memberikan sangat banyak inspirasi untuk ini.

    Seperti handphone, yang terinspirasi dari communicator di film Star Trek. Atau PDA / smartphone / tablet & Google Earth, yang terinspirasi dari tricorder.

    Berbagai teknologi yang tadinya hanya dikhayalkan di Star Trek terus bermunculan & mulai menjadi kenyataan. Seperti mesin Teleport, kini sudah ada di Amerika & Austria.
    Memang masih sangat banyak keterbatasannya. Namun, untuk sebuah teknologi yang tadinya dikira mustahil, maka sekedar ada saja tentu sudah bagaikan mukjizat πŸ™‚

    Malah ada engineer yang berhasil membuat desain pesawat luar angkasa Star Trek, yang sudah bisa dibuat dengan teknologi yang ada, dalam waktu 20 tahun.

    Desainnya tersebut bisa membawa manusia ke Planet Mars dalam waktu 90 hari. Dan pesawat tersebut juga bisa berfungsi sebagai stasiun luar angkasa.

    Jadi, jangan anggap remeh film-film fiksi ilmiah seperti ini.
    Karena inspirasi adalah awal dari realisasi πŸ™‚

Dan masih sangat banyak berbagai dampak positif lainnya dari seri Star Trek, misalnya seperti yang dibahas di sebuah artikel Wikipedia ini, dan berbagai artikel-artikel lainnya di berbagai penjuru Internet.

Bagi saya pribadi, ada banyak pelajaran yang saya dapatkan dari berbagai episode Star Trek. Contoh nyata kepemimpinan berbagai kapten nya banyak yang bisa dipraktekkan. Namun, salah satu pelajaran paling berkesan adalah justru dari seorang dokter, yaitu Beverly Crusher.

Yaitu, “The only way to hurry is to take your time

Dalam salah satu episode Star Trek versi buku, berjudul “The Soldiers of Fear”, Beverly Crusher diperlihatkan sedang dalam tekanan untuk mengerjakan sesuatu dengan secepat mungkin. Kawan-kawannya sedang sekarat terkena senjata biologis yang belum dikenal.

Dikutip :

Over the years, she had learned that taking her time was the only way to really hurry.
Any other method caused her to make mistakes.

Saya tersentak. Ini adalah kesalahan yang sering saya lakukan.

Karena terburu-buru, saya jadi melakukan berbagai kesalahan, dan bukannya jadi lebih cepat, namun akhirnya malah jadi menghabiskan lebih banyak waktu — selain mengerjakan pekerjaan tersebut, ditambah lagi dengan memperbaiki berbagai kesalahan yang terjadi.

Sejak itu, saya selalu berusaha untuk bekerja dengan cukup cepat, namun tetap mengutamakan ketelitian.

Tidak terhitung berapa banyak waktu yang jadi bisa dimanfaatkan dengan baik karena petuah tersebut. Ini adalah satu dari berbagai pelajaran baik yang saya dapatkan dari Star Trek.

Penutup

Di zaman yang penuh dengan konten sampah di berbagai media massa; sinetron galau, infotainment gosip, dst; film-film seperti Star Trek merupakan alternatif yang jauh lebih mendidik. Kita berharap agar di masa depan akan ada makin banyak konten berkualitas seperti ini.

Terimakasih kepada Pak Gene Roddenberry atas warisannya ini. Semoga suatu hari, umat manusia bisa menciptakan dunia yang ideal seperti yang dicita-citakan oleh beliau.

Selamat Tinggal, Facebook

Di akhir bulan Ramadhan kemarin, saya memutuskan untuk menutup (deactivate) account saya di Facebook.
Pada saat ini, tentu saja tindakan tersebut dilihat sebagai suatu hal yang aneh. Banyak yang bingung & mempertanyakannya kepada saya.

Alasannya ada banyak, yaitu karena berbagai problem di seputar Facebook itu sendiri. Setelah lama mengalaminya, maka akhirnya saya putuskan untuk berhenti / menutup account saya di Facebook tsb : http://facebook.com/sufehmi.
Beberapa kawan lainnya juga sudah menyuarakan ketidak sukaan mereka dengan masalah-masalah seputar Facebook.

Apa saja masalah-masalah tersebut ?

MASALAH-MASALAH DI FACEBOOK

  1. Invisible / tidak muncul di Search Engine : Saya sudah menulis di blog saya sejak tahun 2001. Karena saya senang berbagi apa yang saya ketahui dengan siapa saja. Dan tulisan-tulisan tersebut pun bebas untuk dipublikasikan ulang dimana saja (selama diberikan credit/acknowledgement)

    Bayangkan bagaimana kagetnya saya ketika menyadari bahwa posting-posting saya di Facebook ternyata tidak muncul di search engine, seperti Google.
    Padahal, privacy levelnya sudah di set ke “Public”. Alhasil, jadinya tidak banyak yang bisa menarik manfaat dari berbagai tulisan saya di Facebook.

    Ini karena sifat Facebook adalah seperti “blackhole”. Dia menyedot semua orang & informasi ke dalamnya, tapi yang sudah berada di dalam kemudian sulit untuk bisa diakses dari luar Facebook. Dengan cara ini, maka Facebook jadi tumbuh besar dengan kecepatan yang cukup fenomenal.

    Seperti Internet di dalam Internet. Tapi Internet yang didalamnya ini, Facebook, bersifat tertutup, menutup diri dari Internet di luarnya.

    Saya tidak senang dengan cara-cara seperti ini. Ini adalah tulisan & konten saya, bukan milik Facebook. Saya berhak untuk membaginya dengan siapa saja yang saya inginkan. Saya membuatnya bukan untuk digunakan dengan semau Facebook.

    Maka mulai sekarang saya akan berhenti menambah konten saya di Facebook, dan akan mulai untuk memindahkannya satu per satu ke blog saya.

    (*) Catatan: ada beberapa jenis konten yang bisa diakses dari luar Facebook dengan bebas / tanpa login. Contoh: notes & pages yang di set Public.

  2. Too much noise / junk : istilah para engineer adalah, “bad signal-to-noise ratio“. Pada saat ini di Facebook, sudah terlalu banyak konten sampah. Saya bisa browsing ratusan posting dalam waktu beberapa menit, dan hanya ada beberapa saja yang bermanfaat.

    Ini kontras total dengan Google Plus. Mayoritas posting yang muncul di stream Google Plus saya mengandung informasi yang sangat bermanfaat.

    Hal ini adalah karena prinsip Facebook, yaitu “consumption of content”. Kita didorong untuk “mengkonsumsi” konten sebanyak-banyaknya, apapun konten itu πŸ™‚ Karena ini jadi meningkatkan nilai Facebook ke para pemasang iklan & partner bisnis mereka yang lainnya juga.
    Facebook juga membatalkan rencananya memasang tombol “Dislike”, karena tombol Dislike ini bisa mengurangi tingkat konsumsi konten di Facebook.

    Google Plus konsisten dengan konsepnya, yaitu berusaha memberikan kontrol semaksimal mungkin ke tangan kita. Dengan fitur “Circles”-nya, maka kita jadi bisa mengatur sumber konten yang kita inginkan.

    Bisa Anda coba sendiri dengan membuka halaman depan Google Plus.
    Perhatikan bahwa di sebelah kiri atas ada 4 tombol, yaitu “All”, “Friends”, “Family”, dan “More” – dimana tombol-tombol tersebut akan menampilkan hanya konten di Circles / kelompok tersebut saja. Mudah sekali.

    Sebenarnya dulu Facebook juga punya fitur serupa, mungkin masih ada yang ingat, yaitu “Lists”. Namun kini entah kenapa fitur tersebut pelan-pelan sudah lenyap dari muka Facebook….

    Facebook : “Content Consumption Is King”.
    Google Plus : (Quality) “Content Is King”.

    Nampaknya kira-kira demikian satu lagi perbedaan Facebook dengan Google Plus. Dan tentu saja saya akan pilih yang lebih menguntungkan diri saya sendiri.

  3. Privacy problems : untuk hal ini, soal privacy kita & perlindungannya, track record Facebook jauh lebih buruk dibandingkan dengan Google Plus. Dari catatan FTC, jadi jelas bahwa bagi Facebook, privacy kita tidak dihargai.

    Dikutip dari http://www.ftc.gov/opa/2011/11/privacysettlement.shtm :

    # In December 2009, Facebook changed its website so certain information that users may have designated as private Γ’β‚¬β€œ such as their Friends List Γ’β‚¬β€œ was made public. They didn’t warn users that this change was coming, or get their approval in advance.

    # Facebook represented that third-party apps that users’ installed would have access only to user information that they needed to operate. In fact, the apps could access nearly all of users’ personal data Γ’β‚¬β€œ data the apps didn’t need.

    # Facebook told users they could restrict sharing of data to limited audiences Γ’β‚¬β€œ for example with “Friends Only.” In fact, selecting “Friends Only” did not prevent their information from being shared with third-party applications their friends used.

    # Facebook had a “Verified Apps” program & claimed it certified the security of participating apps. It didn’t.

    # Facebook promised users that it would not share their personal information with advertisers. It did.

    # Facebook claimed that it complied with the U.S.- EU Safe Harbor Framework that governs data transfer between the U.S. and the European Union. It didn’t.

    # Facebook claimed that when users deactivated or deleted their accounts, their photos and videos would be inaccessible. But Facebook allowed access to the content, even after users had deactivated or deleted their accounts.

    Sangat keterlaluan sekali. Apalagi poin yang terakhir — ternyata konten milik kita tetap disimpan & dibukakan oleh Facebook, bahkan setelah kita menutup / menghapus account kita πŸ™

    Dan setelah kena hukum oleh FTC ini pun tetap saja Facebook tidak berubah. Misal: mungkin sebagian kita masih ingat ketika tiba-tiba alamat email di halaman Profile kita di Facebook mendadak berubah menjadi alamat email di Facebook, contoh: sufehmii@facebook.com.

    Tanpa izin atau bahkan sekedar pemberitahuan sama sekali, dengan seenaknya Facebook mengubah halaman profile pribadi kita.

    Saya merasa sudah cukup muak diperlakukan seenaknya oleh Facebook. No more.

  4. Security : dalam soal ini, lagi-lagi sejarah Facebook cukup buruk dibandingkan dengan Google Plus. Bahkan sampai foto pribadi Mark Zuckerberg sendiri pun sampai sempat bocor di Internet karenanya.
  5. Sulit mengambil data milik kita sendiri : Facebook menyediakan fasilitas agar kita bisa mendownload seluruh data & konten kita yang ada di Facebook. Namun, proses downloadnya tidak lancar & sulit, seperti yang dialami juga oleh seorang kawan. Ukurannya besar, dan proses downloadnya lambat. Terkesan bahwa ini, akses ke data milik kita sendiri, bukanlah prioritas bagi Facebook.

    Di Google Plus adalah kebalikannya. Dengan gagah, Google mencantumkan menu berjudulkan “Data Liberation“. Dari menu ini, kita bisa dengan mudah men download data-data milik kita sendiri.
    Salut sekali untuk Google atas legowonya.

Menilik semua problem ini, maka saya memutuskan untuk menutup account saya di Facebook.

APA YANG TERJADI ?

Well…tiba-tiba account saya aktif kembali di sekitar pertengahan bulan September πŸ™‚
Saya bingung ketika menerima kembali notifikasi via email, seputar berbagai aktifitas kawan-kawan saya di Facebook.

Diskusi mengenai hal ini akhirnya tidak juga memberikan kepastian, karena ada beberapa kemungkinan penyebabnya. Di lain sisi, Facebook memang sudah dihukum oleh FTC karena hal ini (account yang sudah non-aktif ternyata tetap dihidupkan oleh Facebook)

BAGAIMANA SELANJUTNYA ?

Setelah menimbang beberapa hal, seperti posisi saya sebagai Admin di beberapa group & pages, maka saat ini saya belum bisa langsung meinggalkan Facebook. Maka saya akan lakukan beberapa hal berikut ini :

  • Berhenti posting konten di Facebook, kecuali link ke artikel blog saya.
  • Menggunakan Facebook sebagai sarana komunikasi. (message / chat)
  • Mulai memindahkan konten-konten yang sudah telanjur ada di Facebook ke blog saya.
  • Terakhir, setelah semua ini selesai (pemindahan konten & delegasi administrasi group/page), maka saya bisa menutup account Facebook ini.

Selamat tinggal Facebook. Selamat datang Google Plus πŸ™‚

Merdeka ! πŸ˜€

BSA Sued by Indonesian company

I thought I’d never see the day – BSA (Business Software Alliance) is currently being sued by an Indonesian company, Multisari, due to the illegal raids carried out to find illegal / pirated software.

I know, I know – what an irony indeed, right ? πŸ™‚ breaking the law to find the breakers of the law, gosh.
What a bunch of genius. πŸ˜€

Context : Here in Indonesia, some(often?)times there are rogue officials, from BSA or Police, who conducted the checks (raids) illegally.

Imagine having your computers / servers seized suddenly, due to suspicion of having illegal software in it.
What a nasty way to halt a company’s daily operation eh? Yet that’s what happened with a lot of companies here.

No search warrant. No warning whatsoever.
Just some officers suddenly showing up in your office, do some quick check – and there goes your computers.

However, most of the victims chose to stay silent. Or, do a backhand deal with said officers, involving some cash of course, to secure the return of their computer.

Some of the victims of these illegal BSA raids also chose to migrate to Linux πŸ™‚ which then are welcomed warmly by the local F/OSS community.
Thanks BSA for sending them our way ! Bill Gates & Steve Ballmer would be SO happy that you did such a great job πŸ˜€

Anyway, Multisari chose to stood its ground. It chose to strike back at these BSA bullies. And I’m so happy to be able to witness such a day. Good for them !

Quoted :


“In case number 517/Pdt.G/2011/PN.Jkt.Pst, Multisari Langgeng Inc. sued BSA Singapore, BSA Indonesia, and BSA Washington DC”


“Multisari sued BSA because of the raids conducted by BSA Singapore (**) and BSA Indonesia to its office on September 22dn, 2011”

(**) What the hell is BSA Singapore doing here, raiding Indonesian companies, on Indonesian soil ?
This is an outrage.

Source : http://www.bisnis.com/articles/hukum-bisnis-perkara-multisari-vs-bsa-masuk-mediasi
(hint: Google Translate is your friend)

MySQL Performance :: Panduan Utama Tentang MySQL & Hardware Yang Dibutuhkan + MySQL Bantai Memcached & NoSQL !

Panduan Utama : MySQL & Hardwarenya Yang Diperlukan

Beberapa client utama saya adalah pengguna MySQL. Software yang mereka gunakan memanfaatkan MySQL sebagai databasenya dengan intensif, dan dengan beban kerja yang banyak & berat.

Karena itu, semua hal seputar topik performa MySQL sangat menarik perhatian saya.

Secara rutin saya & tim kami melakukan berbagai penelitian seputar kinerja MySQL.
Untuk beban kerja tertentu, bagian sistim yang mana yang menjadi bottleneck ? Bagaimana cara melenyapkan bottleneck tersebut ? Bagaimana meningkatkan response time dari MySQL ? Bagaimana cara meningkatkan kapasitas pemrosesan datanya ? Dan seterusnya.

Karena itu saya cukup terkejut gembira menemukan file presentasi berikut ini — dimana berbagai isinya selaras dengan banyak dari temuan kami selama ini. Maka, Anda akan dapat memanfaatkan informasi di dokumen ini seketika; dan tidak perlu sampai melakukan riset selama bertahun-tahun seperti yang kami lakukan secara rutin:

[ Linux & Hardware Optimizations For MySQL ]

Berikut ini adalah beberapa poin-poin ringkasannya :

  • Hardware RAID bisa mengakibatkan performa yang buruk : Tidak setaranya kualitas berbagai produk hardware RAID yang ada jadi bisa menyebabkan justru turunnya performa dibandingkan jika tanpa RAID. Prosesor yang melempem, firmware yang buggy / tidak berkualitas, dst — semua ini dapat menyebabkan penurunan kinerja yang cukup serius. Karena itu sudah cukup lama kami menyarankan untuk melakukan RAID secara software, terutama RAID0 / RAID10.
  • Banyak RAM = Kinerja Naik : MySQL dapat memanfaatkan RAM yang ada untuk banyak hal — mengatur agar proses INSERT menjadi sequential ke disk (sangat signifikan untuk harddisk / bukan SSD), “join” buffer, cache, dst.

    Pasang RAM sebanyak-banyaknya di server database Anda, dan lalu atur setting MySQL, agar bisa memanfaatkan RAM yang ada tersebut.

  • RAID0 / RAID10 adalah cara termurah untuk meningkatkan kinerja disk
  • InnoDB lebih kencang untuk Write-Ops : InnoDB melakukan proses row-level locking pada saat write — dan bukannya table-level locking seperti MyISAM. Pada MyISAM, jika sedang ada proses Write (insert / update / delete) maka seluruh operasi lainnya dihentikan oleh MySQL. Karena itu, pada table MyISAM yang proses Write nya cukup banyak, performanya bisa langsung anjlok dengan sangat drastis.
  • SSD SATA lebih lambat daripada SSD PCI-Express : kadang bisa lebih dari 2x lipat.
  • BBWC = Battery Backed-up Write Cache : satu kelebihan Hardware RAID adalah BBWC. Dengan BBWC, maka proses Write bisa menjadi jauh lebih cepat. Jangan lupa untuk mematikan dulu write cache di masing-masing disk nya sendiri.

Dan masih ada sangat banyak lagi tips & informasi berguna lainnya, yang sulit untuk ditemukan dimana-mana.
Berbeda dengan berbagai artikel di banyak situs, dokumen ini sangat padat isinya, dan tidak bertele-tele. Straight to the point. Sampai kadang bisa kebingungan sendiri membacanya πŸ™‚

Sangat direkomendasikan untuk mereka yang banyak bersentuhan dengan MySQL.

Untuk melakukan sendiri berbagai proses profiling & optimization nya, saya juga bisa merekomendasikan dokumen ini : [ Performance TUning & Stabilization Tips ]


MySQL Bantai Memcached & NoSQL : 750.000 query / second !

Beberapa tahun terakhir ini kita sering mendengar bagaimana MySQL itu lambat. Bahwa musti pakai Memcached baru bisa agak cepat / meningkat kapasitas (pemrosesan data) nya. Bahwa untuk jumlah query yang sangat banyak, maka musti membuang MySQL dan pindah ke NoSQL.

Yoshinori Matsunobu membuktikan bahwa MySQL sebetulnya amat kencang – dengan Plugin “HandlerSocket”, maka MySQL jadi bisa memproses 750.000 query per detik ! Sementara memcached hanya bisa mencapai 420.000 qps, dan Yoshinori belum berhasil menemukan produk NoSQL yang performanya bisa menyaingi ini.

Secara ringkas – HandlerSocket adalah plugin yang memungkinkan kita untuk mengakses database MySQL secara direct / bypass layer SQL internalnya. Jadinya seperti NoSQL juga, hanya saja ini di MySQL – bukan menggunakan database server lainnya.

HandlerSocket ini, karena berbasis MySQL, jadi memiliki berbagai kelebihan berikut ini dibandingkan dengan software NoSQL biasa :

  • Databasenya bisa diakses secara normal : karena mengakses database MySQL, maka datanya tetap bisa diakses secara normal / dengan perintah / query SQL biasa. Contoh: pembuatan laporan, tetap bisa menggunakan query SQL biasa.

    Tidak seperti software NoSQL lainnya; dimana seluruh akses harus berupa perintah NoSQL.

  • Crash-safe : HandlerSocket di desain untuk menggunakan database engine InnoDB di MySQL.
  • Semua keuntungan operasional MySQL : karena HandlerSocket berjalan di dalam MySQL sebagai plugin, maka semua manfaat MySQL bisa didapatkan — replication, online backup, SQL, internal cache / buffer pool, monitoring, SHOW xxxx STATUS, dst.
  • Tidak perlu merubah MySQL : karena berupa plugin, sehingga langsung kompatibel dengan semua versi MySQL.
  • Kompatibel dengan semua engine database di MySQL.
  • Dll

Siapa sangka ternyata kita tidak perlu pindah ke software NoSQL untuk mendapatkan performa yang tinggi ? Terus gunakan saja MySQL + HandlerSocket plugin.


Penutup

Berbeda dengan mitos & khayalan yang lazim ada, MySQL sebetulnya mampu memberikan kinerja yang sangat tinggi, dengan tetap menjaga integritas data kita.

Dan di luar dugaan, ketakutan saya paska akuisisi MySQL oleh Oracle tidak terjadi. MySQL tidak dibunuh oleh Oracle – tetapi, malah dikembangkan dengan jauh lebih cepat & mengesankan.
MySQL 5.5.x & MySQL Cluster 7.2.x adalah produk-produk MySQL yang paling impresif yang pernah saya temui. InnoDB di MySQL 5.5.x sudah sangat advanced dibandingkan versi sebelumnya. Dan MySQL Cluster 7.2.x akhirnya bisa menyimpan data di disk. Dan banyak kemajuan signifikan lainnya.

Pengetahuan mengenai seluk-beluk MySQL akan memungkinkan kita untuk membuat performanya melesat jauh dari para kompetitornya.

Bahan bacaan lebih lanjut :

Seri Belajar Open Source Cara Copas (BOSCA) : Install MySQL Cluster (tanpa root)

Belum lama ini Oracle telah merilis versi terbaru dari MySQL Cluster, yaitu versi 7.2.x. Ada banyak kelebihan versi terbaru ini, namun yang paling signifikan adalah kemampuannya untuk menyimpan database di disk.

Ya, dulu MySQL Cluster hanya bisa menyimpan data di memory.
Memang ini jadi meningkatkan performa, namun di lain sisi, otomatis jadi sangat beresiko. Jika server mati mendadak, maka seluruh data akan lenyap.

MySQL Cluster versi 7.2.x sudah tidak memiliki limitasi ini lagi. Ditambah dengan berbagai enhancements lainnya, maka saya bisa merekomendasikan versi ini sebagai awal yang baik untuk mulai belajar / menggunakan MySQL Cluster.

Panduan ini akan memungkinkan Anda untuk memasang MySQL Cluster tanpa memerlukan user root. Ini berarti bahwa Anda jadi bisa untuk memasang bahkan banyak MySQL Cluster di satu komputer.
Ini akan sangat berguna misalnya untuk melakukan riset / ujicoba.

Seri BOSCA = Belajar Open Source Cara copAs (copy-paste) :: artikel ini saya tuliskan sedemikian rupa, sehingga Anda tinggal copas / copy-paste saja ke Terminal / Console.
Sehingga hasilnya langsung bisa dinikmati.

Saya percaya bahwa learning by doing adalah cara belajar yang terbaik. Pengetahuan & pemahaman akan otomatis didapatkan dengan langsung praktek / melakukan.
Seri artikel BOSCA bertujuan untuk membantu Anda agar dapat segera mulai melakukan praktek, dengan usaha yang seminimal mungkin.

Selamat menikmati :

### perlu install library AIO (Asynchronous I/O) di beberapa distro
sudo apt-get install libaio1

mkdir $HOME/mysql-cluster
cd  $HOME/mysql-cluster

### Download dari http://www.mysql.com/downloads/cluster/
### Pilih "Linux - Generic 2.6 (x86, 64-bit), Compressed TAR Archive"
wget -c http://mysql.ntu.edu.tw/Downloads/MySQL-Cluster-7.2/mysql-cluster-gpl-7.2.5-linux2.6-x86_64.tar.gz

tar xzvf mysql-cluster-gpl-7.2.5-linux2.6-x86_64.tar.gz

ln -s mysql-cluster-gpl-7.2.5-linux2.6-x86_64 mysqlc
mkdir my_cluster my_cluster/ndb_data my_cluster/mysqld_data my_cluster/conf

### buat beberapa direktori untuk file PID, socket, dan log
mkdir $HOME/mysql-cluster/mysqlc/var
mkdir $HOME/mysql-cluster/mysqlc/var/log
mkdir $HOME/mysql-cluster/mysqlc/var/run
chown -R $USER:$USER $HOME/mysql-cluster/mysqlc/var

########## membuat file-file konfigurasi
### buat file $HOME/mysql-cluster/my_cluster/conf/my.cnf
echo "[mysqld]" >> $HOME/mysql-cluster/my_cluster/conf/my.cnf
echo "ndbcluster" >> $HOME/mysql-cluster/my_cluster/conf/my.cnf
echo "datadir=$HOME/mysql-cluster/my_cluster/mysqld_data" >> $HOME/mysql-cluster/my_cluster/conf/my.cnf
echo "basedir=$HOME/mysql-cluster/mysqlc" >> $HOME/mysql-cluster/my_cluster/conf/my.cnf
echo "port=5000" >> $HOME/mysql-cluster/my_cluster/conf/my.cnf

### buat file $HOME/mysql-cluster/my_cluster/conf/config.ini
echo "[ndb_mgmd]" >> $HOME/mysql-cluster/my_cluster/conf/config.ini
echo "hostname=localhost" >> $HOME/mysql-cluster/my_cluster/conf/config.ini
echo "datadir=$HOME/mysql-cluster/my_cluster/ndb_data" >> $HOME/mysql-cluster/my_cluster/conf/config.ini
echo "NodeId=1" >> $HOME/mysql-cluster/my_cluster/conf/config.ini
echo "[ndbd default]" >> $HOME/mysql-cluster/my_cluster/conf/config.ini
echo "noofreplicas=2" >> $HOME/mysql-cluster/my_cluster/conf/config.ini
echo "datadir=$HOME/mysql-cluster/my_cluster/ndb_data" >> $HOME/mysql-cluster/my_cluster/conf/config.ini
echo "[ndbd]" >> $HOME/mysql-cluster/my_cluster/conf/config.ini
echo "hostname=localhost" >> $HOME/mysql-cluster/my_cluster/conf/config.ini
echo "NodeId=3" >> $HOME/mysql-cluster/my_cluster/conf/config.ini
echo "[ndbd]" >> $HOME/mysql-cluster/my_cluster/conf/config.ini
echo "hostname=localhost" >> $HOME/mysql-cluster/my_cluster/conf/config.ini
echo "NodeId=4" >> $HOME/mysql-cluster/my_cluster/conf/config.ini
echo "[mysqld]" >> $HOME/mysql-cluster/my_cluster/conf/config.ini
echo "NodeId=50" >> $HOME/mysql-cluster/my_cluster/conf/config.ini


################ inisialisasi
### Inisialisasi database
cd $HOME/mysql-cluster/mysqlc
$HOME/mysql-cluster/mysqlc/scripts/mysql_install_db --no-defaults --datadir=$HOME/mysql-cluster/my_cluster/mysqld_data/

### menjalankan MySQL Cluster untuk pertama kali
cd ../my_cluster/
$HOME/mysql-cluster/mysqlc/bin/ndb_mgmd -f $HOME/mysql-cluster/my_cluster/conf/config.ini --initial --configdir=$HOME/mysql-cluster/my_cluster/conf/

$HOME/mysql-cluster/mysqlc/bin/ndbd -c localhost:1186

$HOME/mysql-cluster/mysqlc/bin/mysqld --defaults-file=$HOME/mysql-cluster/my_cluster/conf/my.cnf --socket=$HOME/mysql-cluster/mysqlc/var/run/mysql.sock --pid-file=$HOME/mysql-cluster/mysqlc/var/run/mysql.pid&


### tunggu sekitar 30 detik, MySQL CLuster sedang launch
### lalu kita bisa cek statusnya :
$HOME/mysql-cluster/mysqlc/bin/ndb_mgm -e show

### terlampir cara untuk membuat table dengan engine NDB / MySQL Cluster
$HOME/mysql-cluster/mysqlc/bin/mysql -h 127.0.0.1 -P 5000 -u root
####### perintah-perintah berikut ini di copy-paste di prompt mysql> #########
create database clusterdb;use clusterdb;
create table simples (id int not null primary key) engine=ndb;
insert into simples values (1),(2),(3),(4);
select * from simples;
exit


### shutdown
$HOME/mysql-cluster/mysqlc/bin/mysqladmin -u root -h 127.0.0.1 -P 5000 shutdown
$HOME/mysql-cluster/mysqlc/bin/ndb_mgm -e shutdown


### buat script startup
echo '#!/bin/bash' >> $HOME/mysql-cluster/startup-cluster.sh
echo "$HOME/mysql-cluster/mysqlc/bin/ndb_mgmd -f $HOME/mysql-cluster/my_cluster/conf/config.ini --initial --configdir=$HOME/mysql-cluster/my_cluster/conf/" >> $HOME/mysql-cluster/startup-cluster.sh

echo "$HOME/mysql-cluster/mysqlc/bin/ndbd -c localhost:1186" >> $HOME/mysql-cluster/startup-cluster.sh

echo "$HOME/mysql-cluster/mysqlc/bin/mysqld --defaults-file=$HOME/mysql-cluster/my_cluster/conf/my.cnf --socket=$HOME/mysql-cluster/mysqlc/var/run/mysql.sock --pid-file=$HOME/mysql-cluster/mysqlc/var/run/mysql.pid&" >> $HOME/mysql-cluster/startup-cluster.sh

chmod 755 $HOME/mysql-cluster/startup-cluster.sh


### buat script shutdown
echo '#!/bin/bash' >> $HOME/mysql-cluster/shutdown-cluster.sh
echo "$HOME/mysql-cluster/mysqlc/bin/mysqladmin -u root -h 127.0.0.1 -P 5000 shutdown" >> $HOME/mysql-cluster/shutdown-cluster.sh
echo "$HOME/mysql-cluster/mysqlc/bin/ndb_mgm -e shutdown" >> $HOME/mysql-cluster/shutdown-cluster.sh
chmod 755  $HOME/mysql-cluster/shutdown-cluster.sh


### untuk startup / shutdown MySQL Cluster, cukup ketik :
$HOME/mysql-cluster/startup-cluster.sh
$HOME/mysql-cluster/shutdown-cluster.sh


### Enjoy !

Seri Belajar Open Source Cara Copas (BOSCA) : Install MySQL Server (tanpa root)

Panduan ini akan memungkinkan Anda untuk memasang MySQL Server tanpa memerlukan user root. Ini berarti bahwa Anda jadi bisa untuk memasang bahkan banyak MySQL Cluster di satu komputer. Ini akan sangat berguna misalnya untuk melakukan riset / ujicoba.

Memasang banyak MySQL Server di satu komputer juga berguna untuk meningkatkan concurrent throughput – pada jumlah koneksi / user yang banyak, kadang MySQL Server nya sendiri yang menjadi bottleneck.
Memasang banyak MySQL Server di komputer tersebut, dengan masing-masing listening di Port yang berbeda, bisa menjadi salah satu alternatif solusinya.

Seri BOSCA = Belajar Open Source Cara copAs (copy-paste) :: artikel ini saya tuliskan sedemikian rupa, sehingga Anda tinggal copas / copy-paste saja ke Terminal / Console.
Sehingga hasilnya langsung bisa dinikmati.

Saya percaya bahwa learning by doing adalah cara belajar yang terbaik. Pengetahuan & pemahaman akan otomatis didapatkan dengan langsung praktek / melakukan.
Seri artikel BOSCA bertujuan untuk membantu Anda agar dapat segera mulai melakukan praktek, dengan usaha yang seminimal mungkin.

Selamat menikmati :

### perlu install library AIO (Asynchronous I/O) di beberapa distro
sudo apt-get install libaio1

mkdir $HOME/mysql-cluster
mkdir $HOME/mysql-cluster/server1
cd  $HOME/mysql-cluster/server1

### Download dari http://www.mysql.com/downloads/mysql/
### Pilih "Linux - Generic 2.6 (x86, 64-bit), Compressed TAR Archive"
wget -c --timeout=10 --tries=0 http://ftp.ntu.edu.tw/pub2/MySQL/Downloads/MySQL-5.5/mysql-5.5.22-linux2.6-x86_64.tar.gz

tar xzvf mysql-5.5.22-linux2.6-x86_64.tar.gz
ln -s mysql-5.5.22-linux2.6-x86_64 mysql

### buat beberapa direktori untuk file PID, socket, dan log
mkdir $HOME/mysql-cluster/server1/mysql/etc
mkdir $HOME/mysql-cluster/server1/mysql/var
mkdir $HOME/mysql-cluster/server1/mysql/var/log
mkdir $HOME/mysql-cluster/server1/mysql/var/run
chown -R $USER:$USER $HOME/mysql-cluster/server1/mysql/var
chown -R $USER:$USER $HOME/mysql-cluster/server1/mysql/etc

################# menyiapkan file konfigurasi
cp $HOME/mysql-cluster/server1/mysql/support-files/config.medium.ini $HOME/mysql-cluster/server1/mysql/etc/my.cnf

################ inisialisasi database
cd $HOME/mysql-cluster/server1/mysql
$HOME/mysql-cluster/server1/mysql/scripts/mysql_install_db --user=$USER --defaults-file=$HOME/mysql-cluster/server1/mysql/etc/my.cnf --basedir=$HOME/mysql-cluster/server1/mysql/  --datadir=$HOME/mysql-cluster/server1/mysql/data/

###### start database
$HOME/mysql-cluster/server1/mysql/bin/mysqld_safe --defaults-file=$HOME/mysql-cluster/server1/mysql/etc/my.cnf  --user=$USER  --basedir=$HOME/mysql-cluster/server1/mysql/  --datadir=$HOME/mysql-cluster/server1/mysql/data/  --socket=$HOME/mysql-cluster/server1/mysql/var/run/mysql.sock --pid-file=$HOME/mysql-cluster/server1/mysql/var/run/mysql.pid --port=9001 &

##### akses database
$HOME/mysql-cluster/server1/mysql/bin/mysql -u root -h 127.0.0.1 -P 9001 

##### shutdown database
$HOME/mysql-cluster/server1/mysql/bin/mysqladmin -u root -h 127.0.0.1 -P 9001 shutdown

### buat script startup
echo '#!/bin/bash' >> $HOME/mysql-cluster/server1/startup-server1.sh
echo "$HOME/mysql-cluster/server1/mysql/bin/mysqld_safe --defaults-file=$HOME/mysql-cluster/server1/mysql/etc/my.cnf  --user=$USER  --basedir=$HOME/mysql-cluster/server1/mysql/  --datadir=$HOME/mysql-cluster/server1/mysql/data/  --socket=$HOME/mysql-cluster/server1/mysql/var/run/mysql.sock --pid-file=$HOME/mysql-cluster/server1/mysql/var/run/mysql.pid --port=9001 &" >> $HOME/mysql-cluster/server1/startup-server1.sh
chmod 755 $HOME/mysql-cluster/server1/startup-server1.sh


### buat script shutdown
echo '#!/bin/bash' >> $HOME/mysql-cluster/server1/shutdown-server1.sh
echo "$HOME/mysql-cluster/server1/mysql/bin/mysqladmin -u root -h 127.0.0.1 -P 9001 shutdown"  >> $HOME/mysql-cluster/server1/shutdown-server1.sh
chmod 755  $HOME/mysql-cluster/server1/shutdown-server1.sh


### untuk startup / shutdown MySQL Cluster, cukup ketik :
$HOME/mysql-cluster/server1/startup-server1.sh
$HOME/mysql-cluster/server1/shutdown-server1.sh


### Enjoy !

Archive-Backup Your Website

This is the #2 article in the backup topics, check out the first one : MySQL Archived Backup

Nowadays, nearly everyone / every company have a website of sorts. What most of us forgot is to back them up, in case of problems.
And as Murphy’s Law stated :

If it can go wrong, it will go wrong – in the worst possible time

Backup of your data can save you from such occasion.

An archived-backup can help you further – should you need to retrieve certain version of your data, then you can. Because it saves multiple copies of your data, each from certain point of time.

A way to do this is by using tools like the excellent rdiff-backup. In short – it’s like Apple’s Time Machine, but can be easily scripted & automated.

For other cases, you may need to create your own script for it.

Below is a script we use to backup our customer’s website.
It will backup both their MySQL database and the actual website itself.

Note that the backup script will archive for 2 weeks.
If you need diffent archive period, please feel free to modify the script, following the example in this article.

Here’s the script : backup-website.sh


#!/bin/bash

### Please change the variables below to suit you
sourcedir="/home/myuser/web"
targetdir="/home/myuser/mybackup"
targetfile="myname"
datestr="`date +%A`"
# 2 months archive
#datestr="`date +%d`"

tempdir="/tmp/$targetfile-$datestr"

dbuser="root"
dbpass="mypass"
database="mydb"

#################################
bmkdir="/bin/mkdir"
btar="/bin/tar"
bbzip2="/bin/bzip2"
bcp="/bin/cp"
bmysqldump="/usr/bin/mysqldump"

################################## start backup now

### create temporary space
$bmkdir $tempdir

### backup database
$bmysqldump -u $dbuser --password=$dbpass $database > $tempdir/$targetfile-$datestr.mysql
$bbzip2 $tempdir/$targetfile-$datestr.mysql

### backup website
$btar cvzf $tempdir/$targetfile-web-$datestr.tar.gz $sourcedir

### 2 weeks archive
$bcp $targetdir/$targetfile-$datestr.tar $targetdir/$targetfile-last-$datestr.tar

### backup website + mysql database
$btar cvf $targetdir/$targetfile-$datestr.tar $tempdir/*


Enjoy πŸ™‚

MySQL Archived Backup

I regard backup as a very important matter. Because one of the certainties in life is this :

Computer WILL Fail

However, with so many computers in our care, we need a way to make it automatic. Otherwise, it will simply take too much time.

Thankfully, this is very easy to do in UNIX / Linux computers.

We have several kind of backup scripts. All of them are quite simple, but essential. Nobody should be without them.

Below you can find a backup script we use to backup MySQL database for our clients. Basically, this is how we use it :

  1. Modify the script to archive for the time range that we’d like.
    The script can archive the backup from 1 week to unlimited. Just remark out the time range that you don’t need (by putting the “#” character in the first column of the particular row).
  2. Make sure we can run mysqldump automatically / with no user intervention.
    This can be done easily by creating a file name ~/.my.cnf
  3. Setup the backup to run automatically via cron
  4. Routinely backup the backup to other servers.
    Yes, there is no such thing as “too much backup”.

Without further ado, here is the script : backup-archive-mysql.sh


#!/bin/bash

### Please change the variables below to suit you
targetdir="/home/myuser/mybackup"
targetfile="db-mydb"
targetsuffix=".mysql"

userdb="root"
database="mydb"

#################################
bcp="/bin/cp"
bmysqldump="/usr/bin/mysqldump"

################################## start backup now
### Archive : 1 week
$bmysqldump -u $userdb $database > $targetdir/$targetfile-`date +%A`$targetsuffix

### Archive : 2 weeks
$bcp $targetdir/$targetfile-`date +%A`$targetsuffix $targetdir/$targetfile-last-`date +%A`$targetsuffix
$bmysqldump -u $userdb $database > $targetdir/$targetfile-`date +%A`$targetsuffix

### Archive : 1 month
$bmysqldump -u $userdb $database > $targetdir/$targetfile-`date +%d`$targetsuffix

### Archive : 2 months
$bcp $targetdir/$targetfile-`date +%d`$targetsuffix $targetdir/$targetfile-last-`date +%d`$targetsuffix
$bmysqldump -u $userdb $database > $targetdir/$targetfile-`date +%d`$targetsuffix

### Archive : 1 year
$bmysqldump -u $userdb $database > $targetdir/$targetfile-`date +%m%d`$targetsuffix

### Archive : 2 years
$bcp $targetdir/$targetfile-`date +%m%d`$targetsuffix $targetdir/$targetfile-last-`date +%m%d`$targetsuffix
$bmysqldump -u $userdb $database > $targetdir/$targetfile-`date +%m%d`.mysql

### No Archive
### WARNING: always monitor your free disk space, or the following line may consume them all
$bmysqldump -u $userdb $database > $targetdir/$targetfile-`date +%Y%m%d`$targetsuffix

Here is a sample of ~/.my.cnf; if this file exist, then various MySQL tools & software will be able to run with no intervention.
Of course you’ll need to adjust its user & password :


[client]
user=root
password=mypassword

Hope you’ll find this useful.
I’ll post our other scripts here from time to time as well. Stay tuned.

Solution : Problem When Upgrading Samsung Galaxy Mini to Gingerbread 2.3.4

That was quite scary – I almost bricked (read: killed!) my phone this morning, when I tried to upgrade it to Gingerbread (Android version 2.3.x).

To cut long story short – tried to install / “flash” Gingerbread ROM into my Samsung Galaxy Mini. There are many excellent tutorials that shows how easy to do this, for example :

# Upgrade Samsung Galaxy Mini and Root to Android Gingerbread 2.3.3
#
Samsung Galaxy Mini S5570XXKPI Android 2.3.4 Gingerbread
# And many others.

However, in my case, the process got stuck at the following text :

<1> START!!!
<1> set download environment.
<1> big partition size!!
<1> mibib download..

I was quite rightly scared at this point, thinking “dang, that’s it – my phone is bricked”.

Thankfully, that was not the case πŸ˜€ after MUCH googling around, I was able to finally upgrade my Galaxy Mini by doing the following :

DISCLAIMER: I shared this info with the intention to help others. However, I offer NO guarantee whatsoever that it will work for you as well.
Be aware that there is always a chance that your phone will end up bricked. Flashing ROM is not yet a 100% safe operation.

Now let’s continue, shall we ?

(1) Find another computer which has NOT Kies installed in it. (Kies is the software provided along with Samsung phones).
Looks like somehow that Kies is interfering with Odin / flashing operation on our Galaxy Mini. NOT good. Bad, bad Kies !

(2) Install Samsung USB driver there. If you haven’t got it, you can download it from here : [ Samsung USB driver ] (18 MB)

(3) Now, start following one of the tutorials listed above.

Now my Galaxy Mini is running Gingerbread 2.3.4 πŸ˜€ yeah !

A bit more info – this is what you’ll get in Odin’s Message Box when everything’s going okay :

Download Start…
<0> Create File…
<1> StartThread Detected : 1
<2> StartThread Detected : 0
<3> StartThread Detected : 0
<4> StartThread Detected : 0
<5> StartThread Detected : 0
<6> StartThread Detected : 0
<7> StartThread Detected : 0
<8> StartThread Detected : 0
<1> setup connection…
<1> odin mode.. check plcatform verification.
<1> VerifyPlatform:V0, P0,R0
<1> START!!!
<1> set download environment.
<1> big partition size!!
<1> mibib download..
<1> 1/10 Finished.
<1> qcsbl download..
<1> 2/10 Finished.
<1> oemsbl download..
<1> 3/10 Finished.
<1> amss download..
<1> 4/10 Finished.
<1> arm11boot download..
<1> 5/10 Finished.
<1> boot.img download..
<1> 6/10 Finished.
<1> recovery.img download..
<1> 7/10 Finished.
<1> system.rfs download..
<1> 8/10 Finished.
<1> data.rfs download..
<1> 9/10 Finished.
<1> csc.rfs download..
<1> 10/10 Finished.
<1> reset pda..
<0> Started Timer
<1> Close serial port and wait until rebooting.
<1> PASS!!!
<0> Destroy instant..
<0> Killed timer

So that’s how I did it. Hopefully it’ll help someone else out there πŸ™‚
Enjoy !

Turut Merayakan HUT RI 66 : AhadPOS Dirilis

Menyambut & merayakan kemerdekaan Republik Indonesia yang ke-66, dengan gembira kami mengumumkan bahwa AhadPOS kini telah resmi dirilis.

AhadPOS v1.2.0 ]
Kode nama rilis ini adalah : Ò€œMinangkabauÒ€

Tentang AhadPOS :
http://ahadpos.com/about/

Fasilitas support :
http://ahadpos.com/support/

Dokumentasi ringkas :
http://ahadpos.com/docs/

Mengapa Fokus Ke UKM ?

Sektor Retail UKM adalah salah satu sektor yang sudah terbukti cukup tahan terhadap beberapa gelombang krisis ekonomi yang terjadi. Ketika berbagai perusahaan raksasa kolaps secara spektakuler, berbagai retail UKM terus hidup. Beberapa bahkan menemukan / membuat peluang-peluang baru, dan menjadi lebih besar paska krisis.

Sektor ini juga sangat padat karya dan menghidupi sangat banyak orang. Bantuan serta dukungan untuk sektor ini akan membantu masyarakat secara luas.

Berikut adalah beberapa fakta seputar pentingnya UKM di Indonesia :

(a) UMKM menyumbang 53,32% PDB (sumber)
(b) Lebih fantastis lagi adalah ketika kita melihat angka penyerapan tenaga kerja Γ’β‚¬β€œ di berbagai daerah, secara konsisten UMKM menyerap lebih dari 95% tenaga kerja.
Di Sukabumi, UMKM bahkan menyerap 99% dari semua tenaga kerja.
(sumber)

Informasi lebih menarik datang dari BPS, yaitu :

# UKM adalah 99,9% dari pelaku usaha usaha Nasional
# Padat Karya : Mempekerjakan 96,95% dari total tenaga kerja
# Padat Karya : Mempekerjakan 90 juta orang (Usaha Besar: hanya 2 juta)
# Menyumbang Pendapatan Nasional sebesar 2000+ Trilyun

(sumber: BPS 2008)

Bantuan kepada sektor ini akan berdampak sangat luas. Karena itu Rimbalinux.com berkomitmen untuk berusaha mendukung mereka.

Masalah & Solusi

Salah satu masalah terbesar pada retail UKM adalah proses penjualan & kontrol stok (inventory control). Kontrol stok amat penting untuk mencegah kehilangan. Dan pada jangka panjang, kontrol stok yang baik bisa sangat membantu untuk optimalisasi stok.
Stok yang terkontrol dan optimal akan sangat membantu kelancaran cashflow, dan meningkatkan keuntungan.

Masalahnya, pekerjaan ini (kontrol stok) cukup memakan waktu, sehingga para pebisnis UKM sering menjadi segan untuk melakukannya. Dan implementasinya secara manual juga rentan kesalahan, dan juga sulit untuk menelusuri sumber kesalahannya.

Semua masalah ini bisa diatasi dengan mudah oleh sebuah sistem POS (Point Of Sales) yang terintegrasi. Tidak hanya berupa layar kasir / transaksi, namun juga sudah mencakup modul kontrol stok.

Pada saat ini, ada banyak masalah dengan berbagai sistem POS, baik yang open source maupun yang proprietary, seperti :

1. Fitur tidak lengkap
2. Reliabilitas
3. Data lock-in
4. Tidak bisa dikembangkan
5. Harga

Software AhadPOS akan memecahkan semua masalah ini, karena dibuat dengan berdasarkan pengalaman langsung dari beberapa UKM di lapangan, dan tersedia dengan lisensi yang bebas (GPL).

Selamat menikmati, dan, Merdeka !!

Lampiran : foto-foto pameran AhadPOS, gedung JCC,
Acara PPKI (Pekan Produk Kreatif Indonesia), 23-27 Juni 2010

AhadPOS - shown on PPKI Expo June 2010 @ JCC, JakartaAhadPOS - shown on PPKI Expo June 2010 @ JCC, JakartaAhadPOS - shown on PPKI Expo June 2010 @ JCC, JakartaAhadPOS - shown on PPKI Expo June 2010 @ JCC, JakartaAhadPOS - shown on PPKI Expo June 2010 @ JCC, JakartaAhadPOS - shown on PPKI Expo June 2010 @ JCC, Jakarta AhadPOS - shown on PPKI Expo June 2010 @ JCC, JakartaAhadPOS - shown on PPKI Expo June 2010 @ JCC, JakartaAhadPOS - shown on PPKI Expo June 2010 @ JCC, JakartaAhadPOS - shown on PPKI Expo June 2010 @ JCC, JakartaAhadPOS - shown on PPKI Expo June 2010 @ JCC, JakartaAhadPOS - shown on PPKI Expo June 2010 @ JCC, Jakarta AhadPOS - shown on PPKI Expo June 2010 @ JCC, JakartaAhadPOS - shown on PPKI Expo June 2010 @ JCC, JakartaAhadPOS - shown on PPKI Expo June 2010 @ JCC, JakartaAhadPOS - shown on PPKI Expo June 2010 @ JCC, JakartaAhadPOS - shown on PPKI Expo June 2010 @ JCC, JakartaAhadPOS - shown on PPKI Expo June 2010 @ JCC, Jakarta

Pameran AhadPOS @ JCC, a set on Flickr.

Di PPKI (Pekan Produk Kreatif Indonesia), 23 – 27 Juni 2010

SOLUSI: Wifi lambat di Ubuntu Linux

Tadi pagi saya melakukan transfer file dari komputer server di rumah via Hotspot. Tapi, kecepatan transfer yang didapat hanya sekitar 100 KBps. Lho, kok parah sekali ya ? Hm…

Untungnya di Linux, kita bisa cari tahu sumber masalahnya dengan mudah.
Jadi, mari kita buka layar Terminal πŸ™‚ dan ketikkan perintah berikut ini di komputer server tersebut :

iwconfig wlan0

Maka kemudian muncul informasi berikut ini di layar Terminal di komputer :

$ iwconfig wlan0
wlan0 IEEE 802.11abg ESSID:"linksys007"
Mode:Managed Frequency:2.462 GHz Access Point: 00:1C:10:66:CC:44
Bit Rate=1 Mb/s Tx-Power=14 dBm
Retry long limit:7 RTS thr:off Fragment thr:off
Power Management:off
Link Quality=47/70 Signal level=-63 dBm
Rx invalid nwid:0 Rx invalid crypt:0 Rx invalid frag:0
Tx excessive retries:0 Invalid misc:0 Missed beacon:0

Aha, langsung kelihatan ada informasi yang menarik disitu : Bit Rate=1 Mb/s, ternyata Wifi di komputer server kecepatannya saat ini hanya 1 Mbps = 128 KBps.
Pantesan lambat sekali πŸ™‚

Solusinya mudah sekali, yaitu cukup ketik baris berikut ini di Terminal untuk set kecepatan Wifi server menjadi 54 Mbps :

sudo iwconfig wlan0 rate 54M

Selesai !
Setelah itu proses transfer file dari komputer server tersebut langsung ngebut tidak terkira πŸ˜€ sukses !

IPv6-ready : Yours Truly

Thanks to a new facility in Dreamhost.com, this blog is now IPv6-ready ! πŸ™‚

(1) “What’s the meaning of that ?“. Well, basically now you can also access this blog via its IPv6 address, which is :

2607:F298:0001:0107:0000:0000:02FF:2B5A

(2) “Cool ! I’d like to do that too, how ?” – if your website is hosted in Dreamhost.com as well, then it’s really easy.

On the “Manage Domain” menu, find your domain name; then click “Add IP” link. See the screenshot on the right for example.

And that’s it πŸ™‚

(3) “Why ?” – alright, this will take some time. Bear with me πŸ™‚

This morning, I got news that IANA just handed it’s last IP blocks to APNIC. Now they have ZERO block available for further allocation.

It may sound nothing of importance, until you find out that the Internet runs on IP addresses πŸ™‚

Imagine for a moment, if houses have no street names, and no number. How would Mr. Postman deliver the packages ?

Same thing with Internet – when new IP address / street names are no longer available, you can not build new streets. Therefore, we’ll be stuck with existing streets only.

The Internet will stop growing.

This may still sound like nothing of importance though – until you realize that, in the last few years, The Internet has been expanding like an exploded nuclear bomb. Suddenly, everyone and their pet got connected to the Internet – Facebook, Twitter, etc.
Suddenly, we can do everything on the Internet – do groceries, buy car (I know I did), revolt (hello Tunisians & Egyptians), shop for music, watch TV, do Xmas shopping, play games with friends, get involved in many communities, etc.

A sudden halt to all these can have a devastating impact to many. Especially businesses, big & small ones alike.

Thankfully, the clever people of The Internet has foresaw this, and devised the solution since 1996. Let us welcome The IPv6.
While IPv4 only has 4 billion of available addresses, IPv6 have 340 undecillion addresses.

“340 undecillion addresses” – to find out how many that is, try writing “34” followed by 37 zeroes. No, I don’t feel like writing out THAT many zeroes πŸ™‚ so, you do that, heh.
Another way to imagine that kind of number is this – if IPv4 is the size of a golf ball, then IPv6 is the size of the Sun (and remember that 1 million Earths can be fit inside the Sun !)

Crazy, I know. But better to overkill rather than face this exhaustion problem again, right ? Right ?

Anyway, back to IPv4 — with the old addresses taken & gone with such speed, we need to start transition to IPv6, like, YEARS ago. But somehow many of us managed not to.
Sure, many of the foundations are ready & in places – the routers, Linux, etc. However, if the houses themselves continue to ignore IPv6, then we’ll risk a parallel Internet : A vast IPv6 world with nothing in it, and a small IPv4 world, crowded & jammed.

So I decided to chip in and do my bit – I’ve booked an IPv6 address for my blog. So when the world moved to IPv6, then this website is ready to welcome you.

Let’s start moving ! πŸ™‚